 https://threepedals.com/wp-content/uploads/2018/09/Three_Pedals_1996_Impala_GenV_LT1_retrofit_cover.jpg
207
300
Josh Korsower
https://threepedals.com/wp-content/uploads/2017/09/three-pedals-logo-2017.svg
Josh Korsower2018-09-02 08:18:032018-09-03 10:00:01Retrofitting the Gen V LT1 Engine
https://threepedals.com/wp-content/uploads/2018/09/Three_Pedals_1996_Impala_GenV_LT1_retrofit_cover.jpg
207
300
Josh Korsower
https://threepedals.com/wp-content/uploads/2017/09/three-pedals-logo-2017.svg
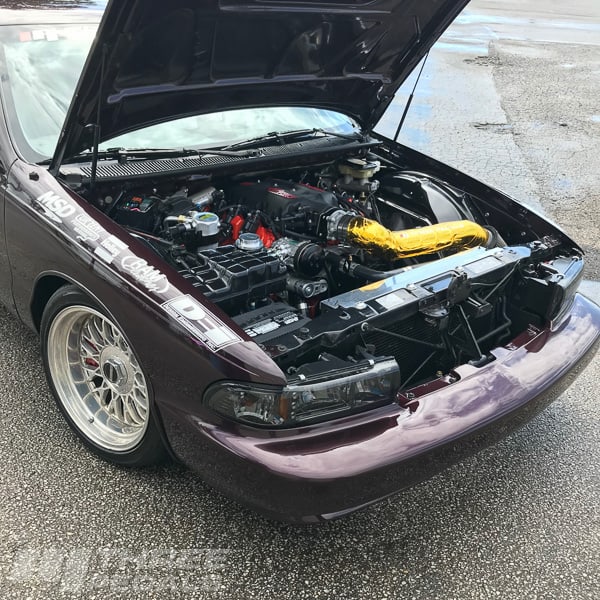
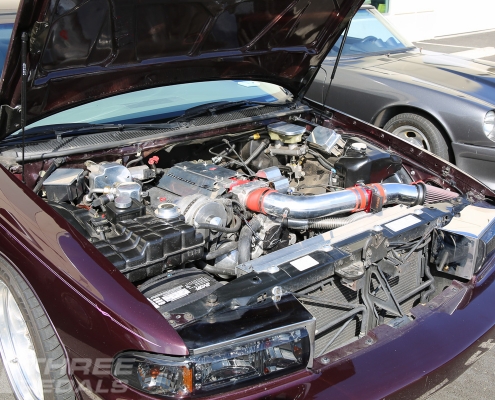
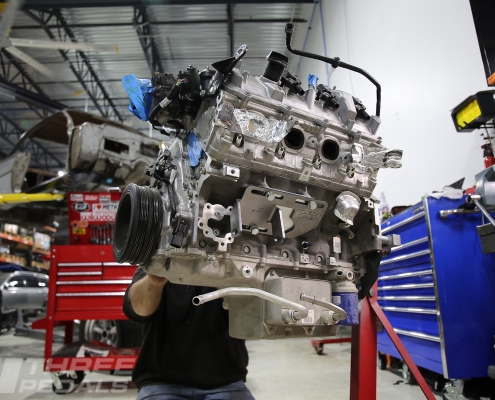
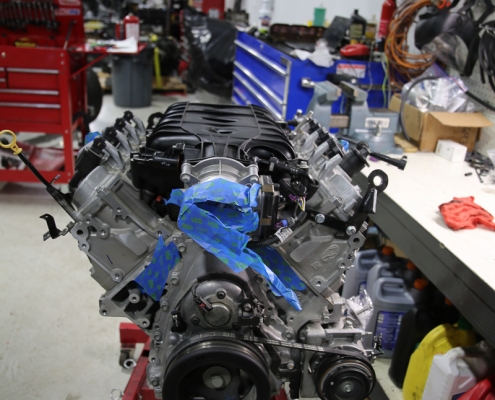
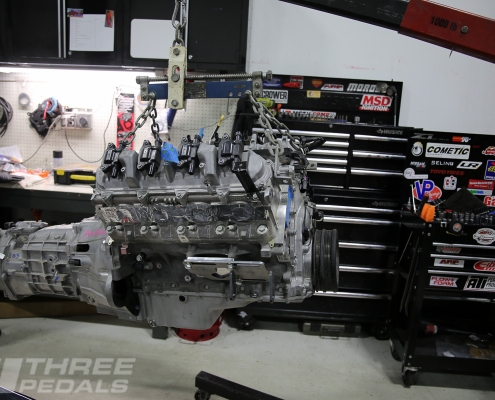
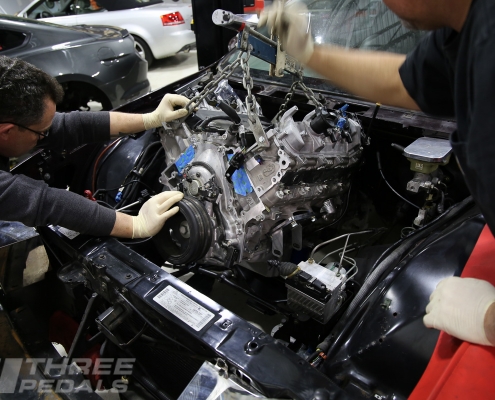
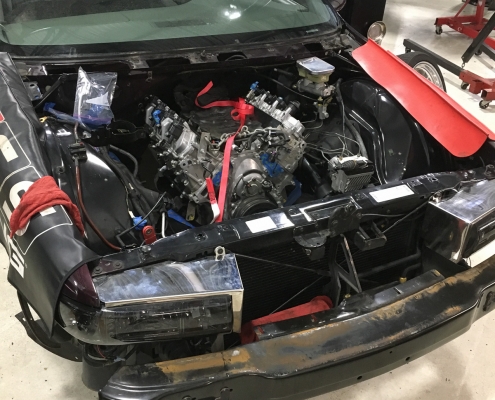
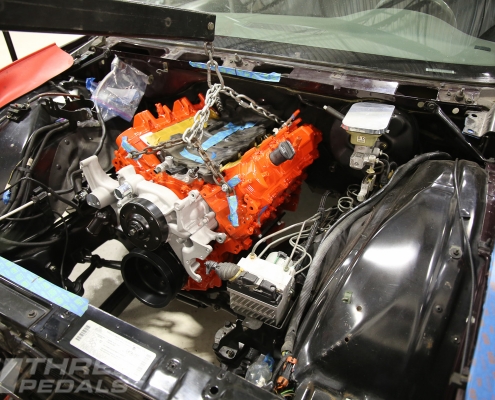
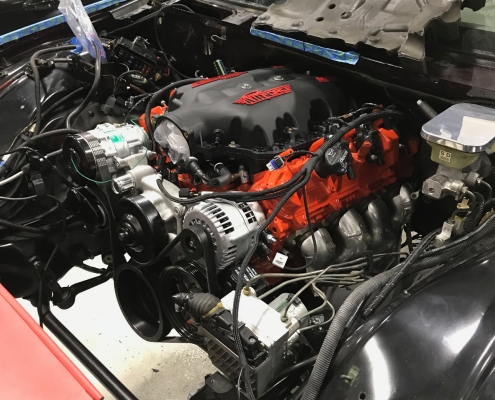
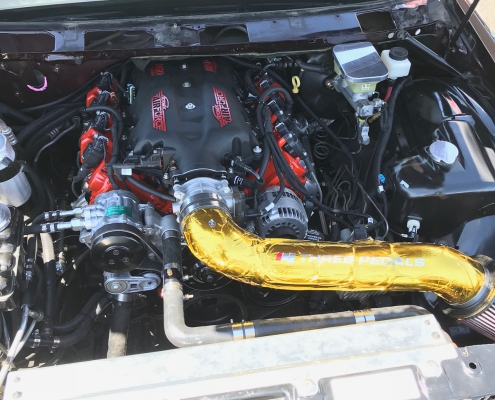
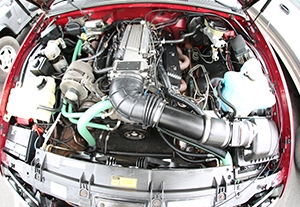
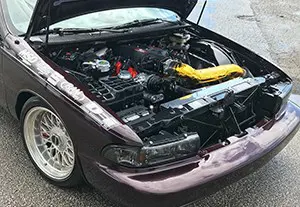
Josh Korsower2018-09-02 08:18:032018-09-03 10:00:01Retrofitting the Gen V LT1 EngineWe gave this 1996 Impala a new drivetrain, swapping in a 2016 Camaro SS LT1 engine and a 6 speed manual transmission. And though this Impala came with an LT1 engine, this Camaro LT1 is entirely different – it is part of the “Gen V” or “LT” family from GM. Retrofitting a Gen V motor presents a few challenges and here we explain how we solved each one.
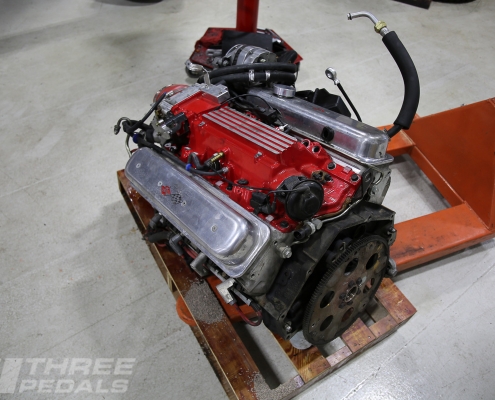
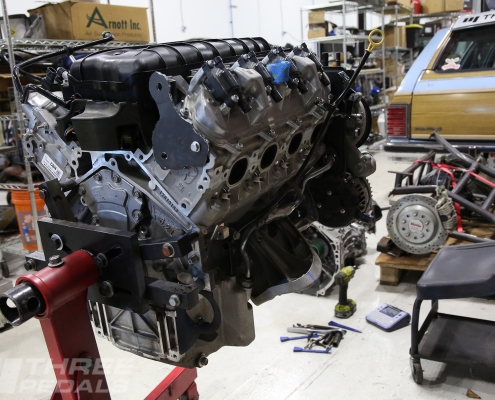
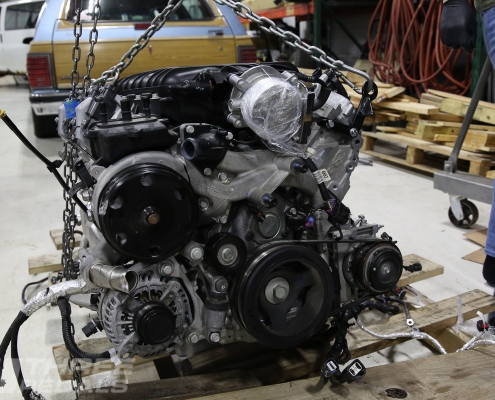
A little bit of background – the Gen V engines from GM debuted in 2014 in the C7 Corvette. Though they share some dimensions with the LS family of engines (Gen III and Gen IV), the Gen Vs are different enough in just about every way when it comes to retrofitting them. Other Gen V motors include the supercharged LT4 and while some aspects of this article cover both engines, many parts are specific to the LT1.
If you’re planning a Gen V retrofit we’ve got some parts to help you get your project going whether you’re turning your own wrenches or having someone do the work. If you’d like a quote to have us install a Gen V in your vehicle please start the conversation here.
The key parts we used to get this Gen V going
- Dirty Dingo motor mount adaptors – need some sort of adaptor to mate the new engine to the frame
- Hooker engine mount clamshells and polyurethane inserts – our go-to mounts for LS & LT swaps
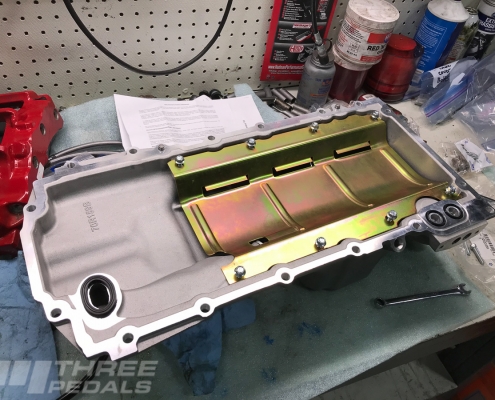
- Holley cast aluminum oil pan – the stock Camaro and Corvette oil pans don’t work well in most older cars
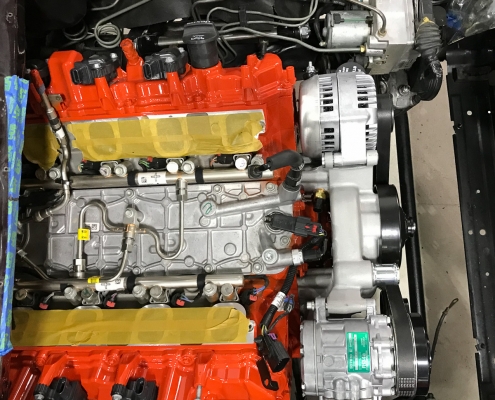
- Holley mid mount accessory system – Camaro and Corvette engines don’t have a hydraulic power steering pump, and the AC won’t clear the frame
- Wiring harness – Current Performance makes a direct-fit harness to put a Gen V LT1 into a ’96 Impala
- Fuel system – we will address this in a separate article
We had to do some repositioning and clearancing
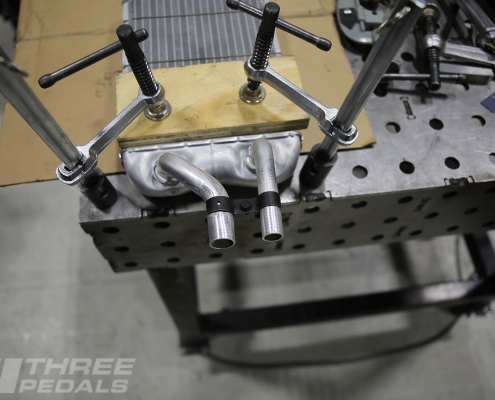
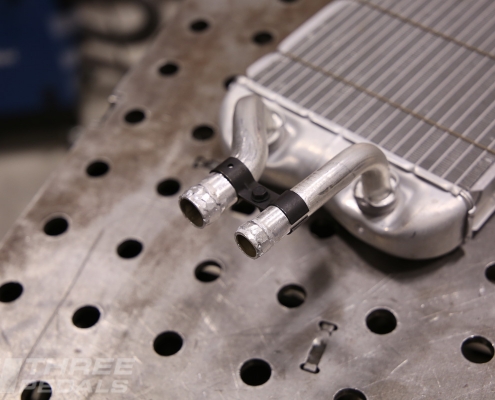
- Heater core & wiper motor – Gen V engines feature direct injection and as a result the cylinder heads are taller than on an LS engine and the Gen V valve covers can interfere with things. In this ’96 Impala both the heater core pipes and wiper motor were in the way.
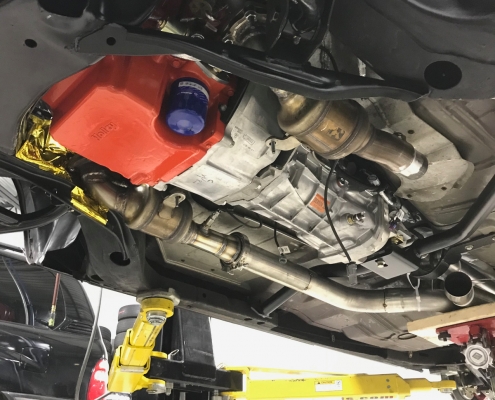
- Exhaust – stock Camaro manifolds and cats don’t clear the frame on the passenger side and both cat pipes hang too low on the Impala. This car owner needs to maintain California compliance, otherwise our new long tube headers for LS and LT B-Body swaps would have been called in for duty. These babies fit perfect with no frame cutting notching shaving or trimming. Nada!
Motor mount adaptors, engine mount clamshells, polyurethane inserts
When we retrofit engines we strive to maintain optimal weight distribution in the finished vehicle. As a general rule, we start with the location of the original engine by noting the location of the back of the block – this is the face to which the transmission bellhousing will mount. Our LS and LT swap parts for the Impala (and in fact all ’77 – ’96 GM full size sedans and wagons) keep the engine in the exact same place as stock. Some swap kits move the engine up and/or forward, and we don’t see any reason to compromise weight distribution.
For the Gen V / LT motors we use Dirty Dingo adaptors. For LS motors we use KDS and Dirty Dingo adaptors.
The Hooker heavy duty clamshells and polyurethane inserts are our go-to for engine swaps into GM cars. These fit a ton of different applications and in our case are a direct replacement. And they’re heavy duty because the steel used in the clamshells is literally twice the thickness of the factory pieces.
Though you can reuse your stock engine mounts and clamshells, on a 22 year old car we recommend replacing the rubber inserts at a minimum. To do so with the factory mounts you have to drill out a rivet or two in order to disassemble the clamshell. And when re-assembling you’ll want to weld – or zip tie – your clamshell back together. In our book it makes more sense just to go with the new Hooker pieces as they’re sturdier and fresh! The clamshells are painted black and ready to go.
Oil pan
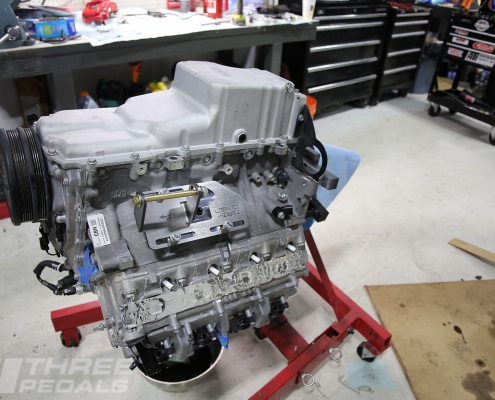
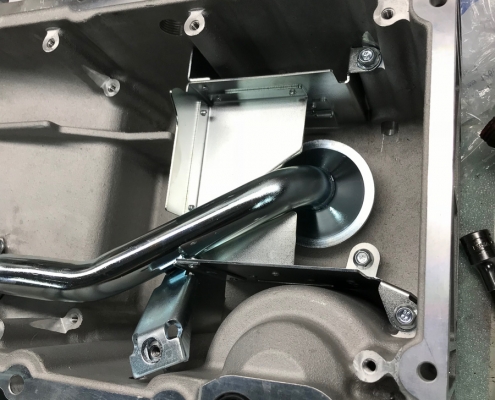
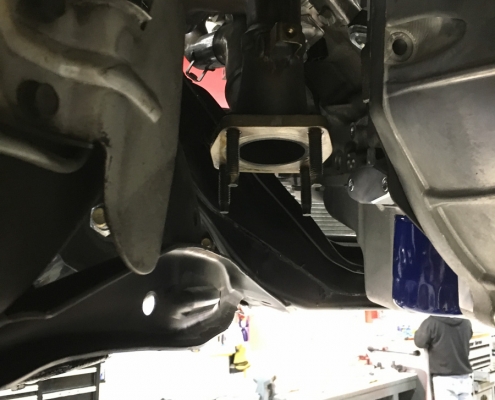
Gen V / LT and LS engines tend to come with oil pans that interfere with the engine crossmembers in older cars and the ’16 Camaro is no exception – the oil pan hangs down too low in the middle of the engine and this will never clear the Impala engine crossmember. While we could cut and re-weld the stock pan, Holley’s cast aluminum pan is a much easier and cleaner solution. This pan is heavy duty and cast just like the Camaro pan. The oil pickup is baffled so as not to go dry during extreme driving, and the new pan includes an oil pickup and windage tray. Note that installing an oil pan on an LS or LT requires a locating step that the old school small and big blocks do not, so read the instructions for this one.
Accessories
There are several considerations when choosing accessories with your engine retrofit, and there are many options available. And to be clear, we’re referring to engine-driven accessories, which are mounted to the front of the block / heads. Along with knowing the exact engine you’ll be running you need to determine which accessories you’ll need, so we’ll address these one-by-one.
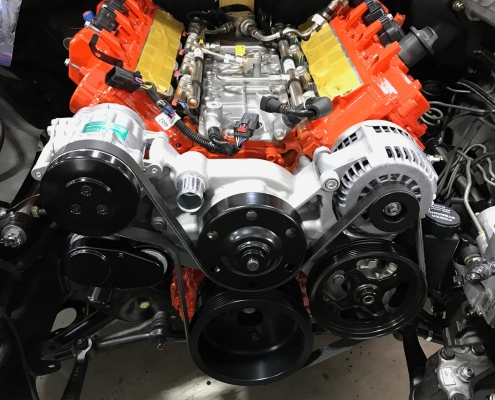
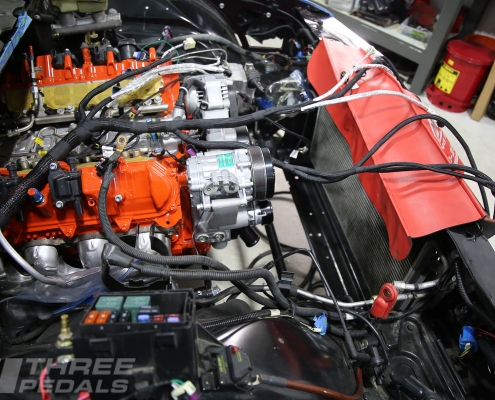
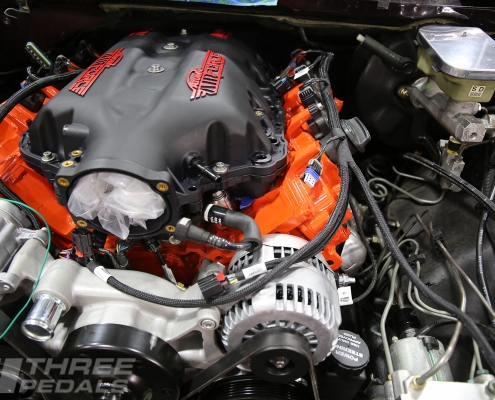
- Alternator – we all need one of these, right? LT and LS engines tend to have 100 amp or higher alternators – modern electronics require more amperage so don’t skimp here. The factory brackets may or may not position the alternator in a good spot for you. The factory Camaro alternator location will interfere with our engine crossmember.
- Power steering – this is one of the biggest items to point out for an LT swap as the Gen V motors out of Camaros and Corvettes do not have a hydraulic power steering pump, instead using electrically driven power steering. Most retrofits will use hydraulic power steering. And when an accessory is added, a new pulley needs a belt, and belt routing and tension are key considerations. Adding a new pulley to the LT motors is not as easy as one would like.
- Water pump – the LT water pump uses an offset pulley, very different from the LS setup. The location of inlets and outlets (upper radiator hose, lower radiator hose, heater core inlet and outlet) are key to note as in some retrofits, these are smack in the way of some hard parts.
- Air conditioning – we always run AC in our cars and most of our customers agree. The Camaro AC compressor is mounted low on the driver’s side and very tight to the engine block; once again the engine crossmember in this Impala is in the way.
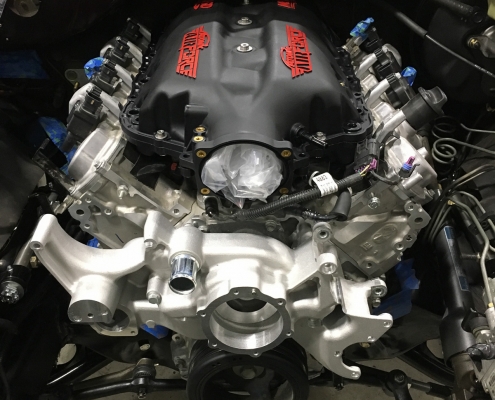
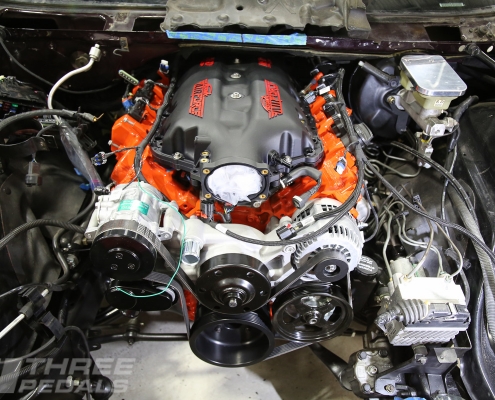
We solved 100% of our accessory packaging and fitment needs with one part number: 20-200, Holley’s mid mount accessory system. This is the slickest system we’ve seen, and it’s very well thought out and incredibly complete. We went with natural aluminum that we clear coated, and it’s also available in black or polished finishes which is a huge time saver if you’re going for one of those looks.
So what makes this system so slick? Holley’s water pump is what does it. This is a unique casting Holley created just for the occasion and the brilliance is that the water pump has cast-in bosses for all the other accessory components. So instead of multiple brackets and supports, the rock solid water pump is the backbone. You don’t want any flex in the mounting brackets – especially when you’re pulling like a freight train past 6,000 RPM. The extra benefit is that all the accessories are pulled in tightly to the crank and water pump pulleys, which gives you tons of space all around the accessories, which of course makes retrofitting so much easier and solves some of the biggest headaches.
But there’s more slickness. There are 2 different heater core inlet/outlet port locations – we used the downward-facing ports as the sideways-facing ports point right at our passenger side upper control arm. And for the lower radiator hose we are using a downward-facing inlet, making hose routing easier and giving us a cleaner-looking final result.
Holley also offers low mount and high mount systems. Please contact us for help finding the right fitment for your application.
Wiring harness
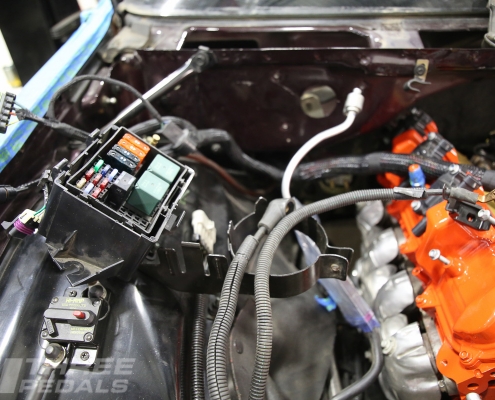
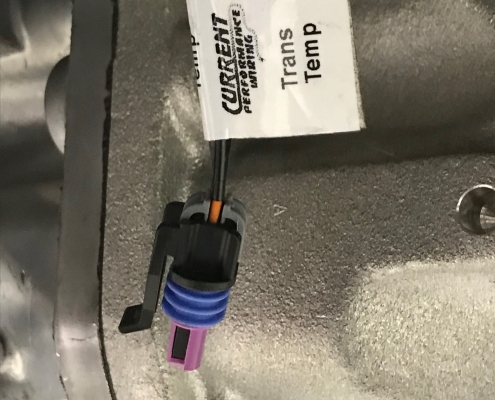
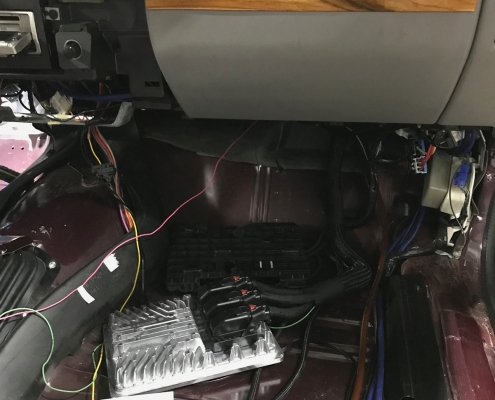
Current Performance knows Impalas and they know Gen V motors and you know what? They offer a “direct fit” wiring harness for our build. The experts there need a few pieces of information – alternator type and location, where we wanted to put the PCM, and yes or no to AC and ABS. We opted for the braided loom which offers abrasion resistance, which is essential in our opinion.
To complete the harness we sent in our original harness, and what comes back is an integrated harness that (1) plugs right into the Impala and (2) plugs right into the LT1. Brilliant to say the least, and a huge time saver. We like wiring, but most people don’t!
Each connector is clearly labeled, and the lengths and locations were perfect for our installation – as we’ve come to expect from Current Performance. Please contact us for help in selecting your wiring harness.
Repositioning
Gen V engines feature direct injection and as a result the cylinder heads are taller than on an LS engine and the Gen V valve covers can interfere with things. In this ’96 Impala both the heater core pipes and wiper motor were in the way.
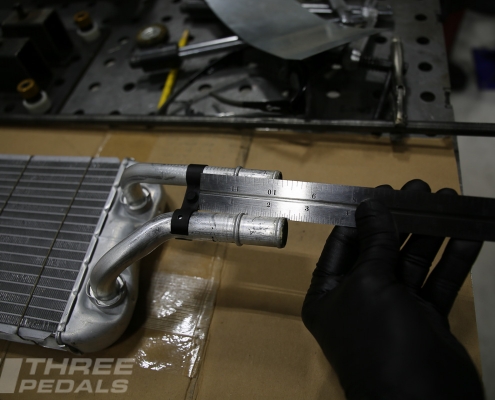
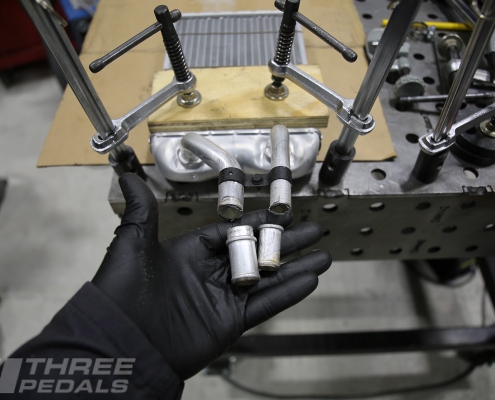
To remedy the heater core interference we trimmed the inlet and outlet so that they were flush with the firewall. This means about 1″ off one tube and about 1-1/2″ on the other tube. To secure the hose clamps we ran the hoses through the firewall, and from inside the cabin we attached the hoses and secured the clamps. We then installed the heater core and ensured the hoses fed through the firewall smoothly.
The hose outlets have a flare to help seal the rubber hoses. Without a suitable flaring tool we instead TIG welded a bead around each outlet and ground this down.
The wiper motor also interferes with the valve covers. We solved this by clocking the motor about 10 degrees clockwise, re-using one of the 3 original mounting holes and drilling 2 new ones.
Clearancing
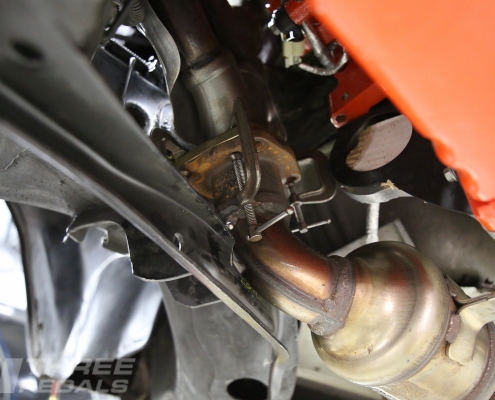
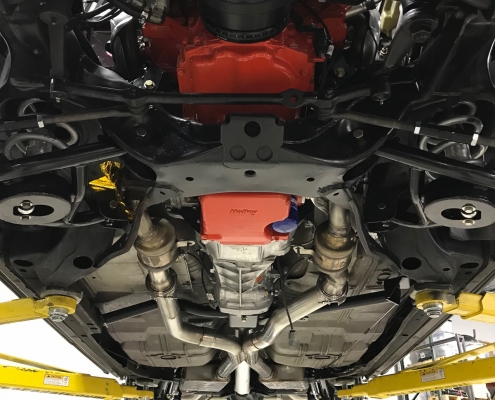
The exhaust clearance we needed is due to the owner’s desire to keep the car legal for California emissions compliance. This means retaining the stock ’16 Camaro exhaust manifolds and catalytic converters, in the stock location.
For the other 99% of you out there we suggest our new long tube headers for LS and LT B-Body swaps – these are made from 321 stainless steel and they fit perfectly with no frame cutting notching shaving or trimming. Nada!
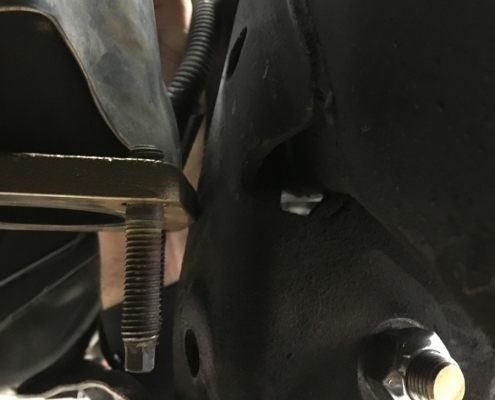
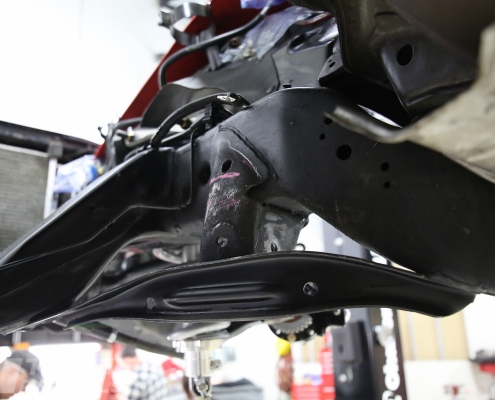
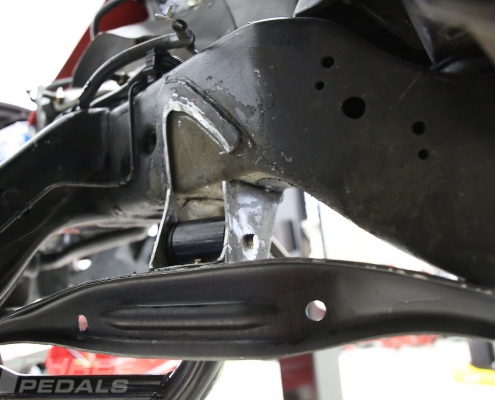
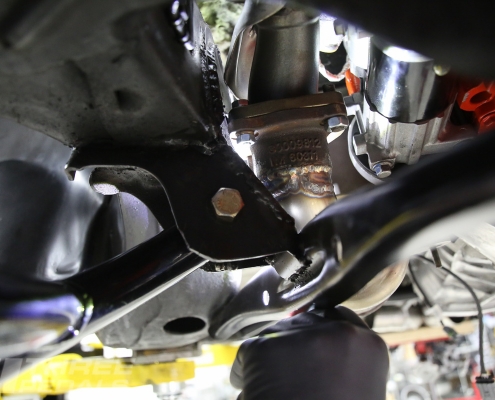
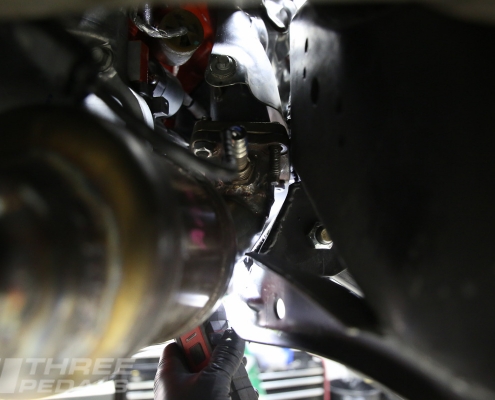
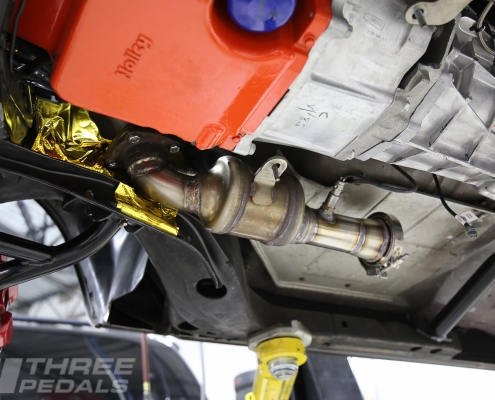
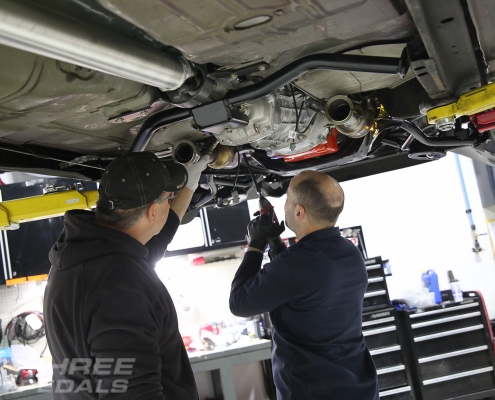
Now back to our stock Camaro manifolds and cats … on the passenger side the manifold exit is more than 1″ farther away from the engine centerline as compared to the driver side, and that’s about where the front lower control arm mounts to the frame. So we cut away a portion of the frame and reinforced it by welding in steel in a more compact fashion. As the front control arm lower bushing is right there, we layered up with Design Engineering Reflect-a-Gold heat shield. We swear they took this stuff right out of NASA’s garage but we’re cool with that.
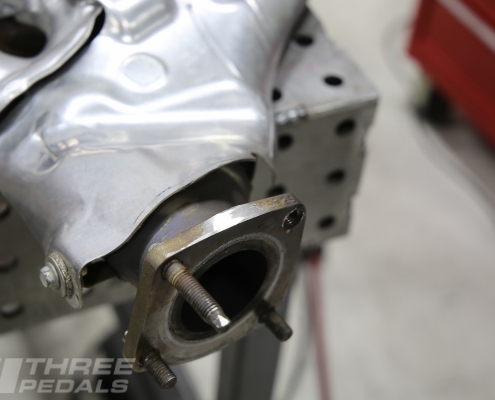
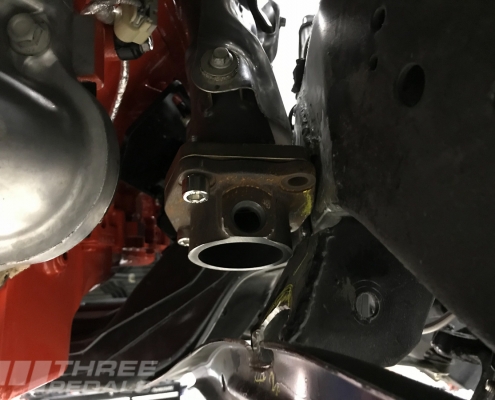
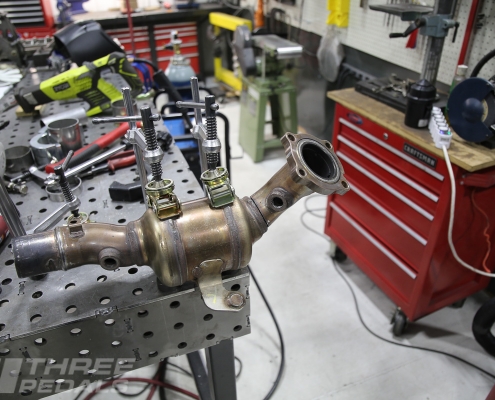
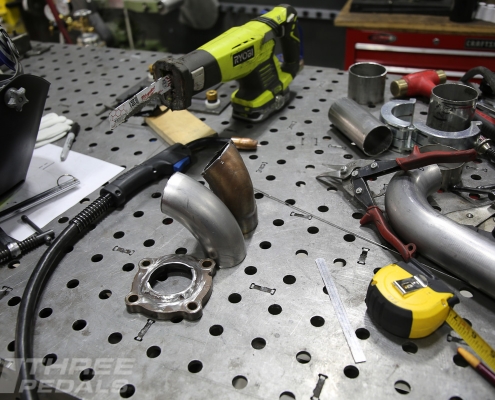
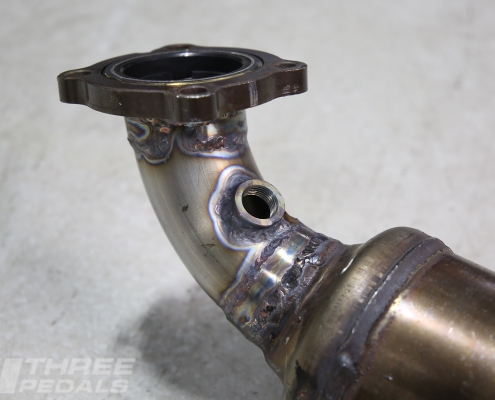
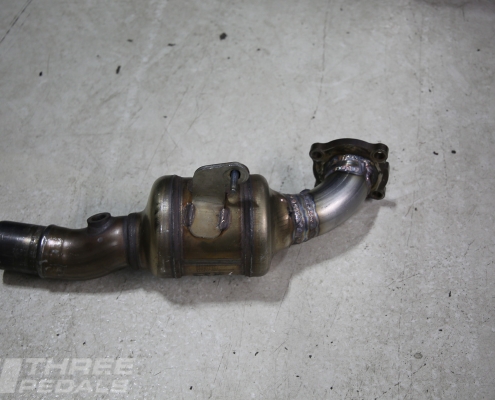
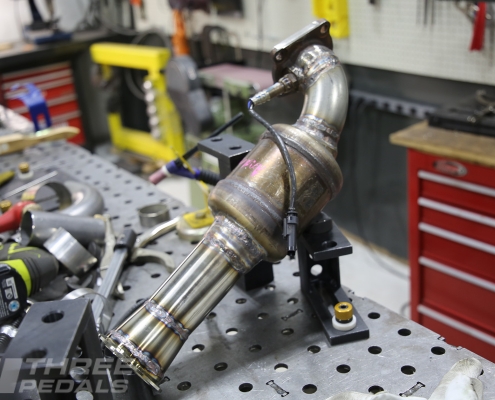
Additionally, the angle of both cat pipes positioned the cats too low in the car, so we tightened up that angle with a new elbow on each side. To connect to the dual 3″ stainless steel exhaust we used Vibrant 3″ 304SS V-band clamps. These feature quick release and a stepped lip for improved mating and sealing.
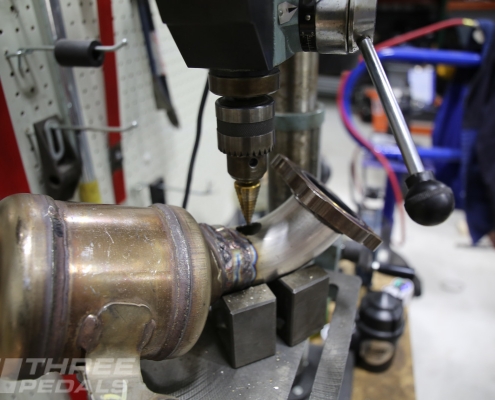
The new elbow on the driver side required a new oxygen sensor bung, so we drilled and welded that in as well. We used 304 stainless steel throughout and TIG welded every joint. The elbows were gusseted to support the weight and rely on the strength of the cast flanges we re-used.
Of course there are still many details of this build that we didn’t cover here, so please check out the other SSubtle Take build articles at the links below.
More Build Articles
 https://threepedals.com/wp-content/uploads/2018/09/Three_Pedals_1996_Impala_GenV_LT1_retrofit_cover.jpg
207
300
Josh Korsower
https://threepedals.com/wp-content/uploads/2017/09/three-pedals-logo-2017.svg
Josh Korsower2018-09-02 08:18:032018-09-03 10:00:01Retrofitting the Gen V LT1 Engine
 https://threepedals.com/wp-content/uploads/2018/09/Three_Pedals_1996_Impala_GenV_LT1_coilover_cover.jpg
207
300
Josh Korsower
https://threepedals.com/wp-content/uploads/2017/09/three-pedals-logo-2017.svg
Josh Korsower2018-09-02 08:18:032018-09-03 10:21:55Coil Over Suspension
https://threepedals.com/wp-content/uploads/2018/09/Three_Pedals_1996_Impala_GenV_LT1_coilover_cover.jpg
207
300
Josh Korsower
https://threepedals.com/wp-content/uploads/2017/09/three-pedals-logo-2017.svg
Josh Korsower2018-09-02 08:18:032018-09-03 10:21:55Coil Over SuspensionInteresting links
Here are some interesting links for you! Enjoy your stay :)Pages
- Big Brake Kits
- Clutch Play
- Factory Seconds
- Our Builds
- Shift Knobs
- Shop
- Wholesale Login
- Wholesale Store
- Dakota Digital HDX Instrument System Specifications
- Dakota Digital RTX Instrument System Specifications
- Dakota Digital VHX Instrument System Specifications
- Dakota Digital VFD Instrument System Specifications
- Jobs
- Pedals & Drivetrain Swaps
- Trucks
- New Products
- SSubtle Take
- Welcome to Three Pedals!
- Car API
- Events
- 1996 Impala Console
- G-Body Request a Quote
- Request a Quote
- Shaken & Stirred
- Car Craft Malibu
- Car Craft Malibu Build Products
- Conversion Kits
- Products
- Shop Online
- Rides Gallery
- About Us
- Services
- Blog
- Contact
- Info
- Cart
- Shipping & Returns
- Privacy Policy
- Terms of Use
- Checkout
- My Account
- Vehicle Search
- Cart
Categories
- 1961 Impala
- 1973 Oldsmobile Cutlass
- 1977 Mercedes 6.9
- 1977 Toyota FJ40
- 1988 Cutlass
- 1989 Pontiac Safari
- 1991 Jeep Wrangler
- 1992 Land Rover D90
- 1995 Caprice 9C1 6 Speed
- 1995 Chevrolet Impala SS
- 1996 Impala Gen V LT1
- 2007 BMW 328xi
- 2012 Dodge Charger SRT8
- 2015 Chevy SS
- 2015 Mustang GT
- 2017 Jeep Rubicon Recon Unlimited
- 2017 Toyota Tacoma
- 499HP Caprice
- About Press
- Blog
- CC/Malibu
- CC/Malibu Blog
- CC/Malibu Video
- FAQ
- Press
- Projects
- Shaken Blog
- Shaken Cool Kids
- Shaken Press
- Shaken Video
- T56 Teardown
- Technical
- Three Pedals #14
- Three Pedals #16
