 https://threepedals.com/wp-content/uploads/2018/09/Three_Pedals_1996_Impala_GenV_LT1_retrofit_cover.jpg
207
300
Josh Korsower
https://threepedals.com/wp-content/uploads/2017/09/three-pedals-logo-2017.svg
Josh Korsower2018-09-02 08:18:032018-09-03 10:00:01Retrofitting the Gen V LT1 Engine
https://threepedals.com/wp-content/uploads/2018/09/Three_Pedals_1996_Impala_GenV_LT1_retrofit_cover.jpg
207
300
Josh Korsower
https://threepedals.com/wp-content/uploads/2017/09/three-pedals-logo-2017.svg
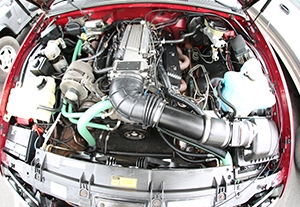
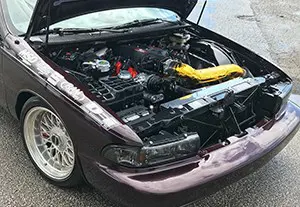
Josh Korsower2018-09-02 08:18:032018-09-03 10:00:01Retrofitting the Gen V LT1 EnginePower is nothing without control – Pirelli used that line in some of their ads back in the late 80’s or early 90’s. SSubtle Take, a 1996 Impala we built with a 2016 Camaro LT1 engine, makes some serious power and we added some serious control.
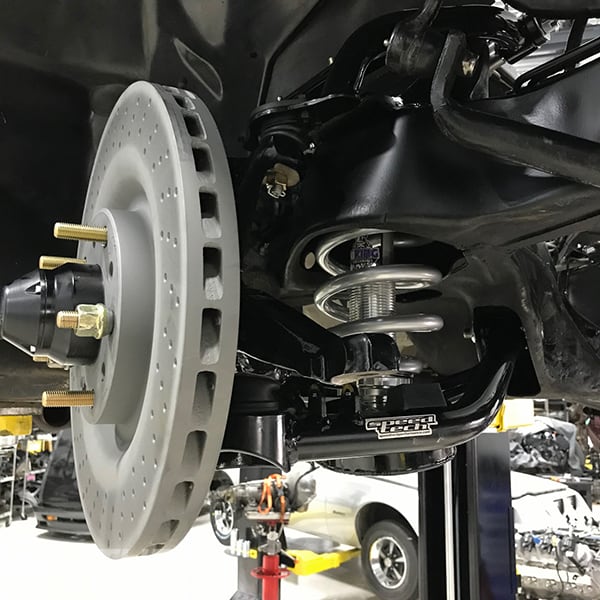
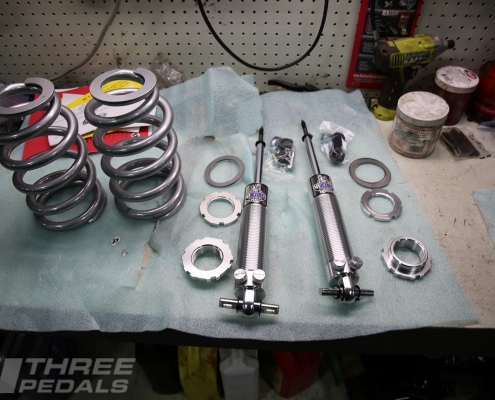
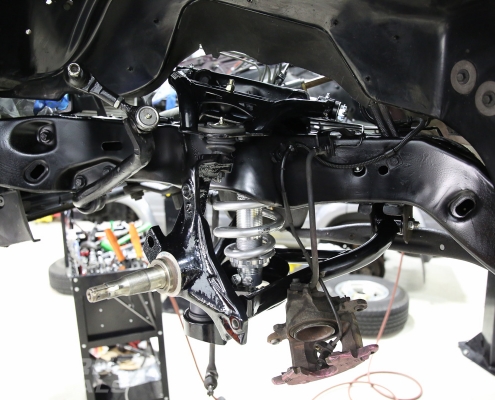
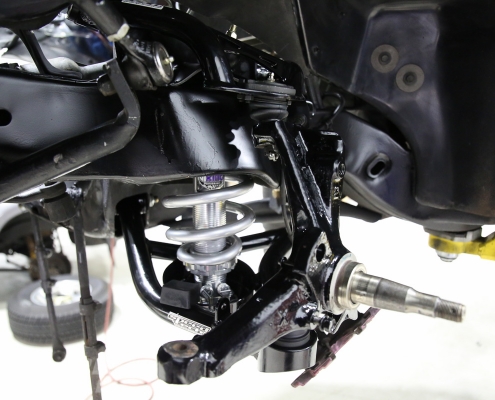
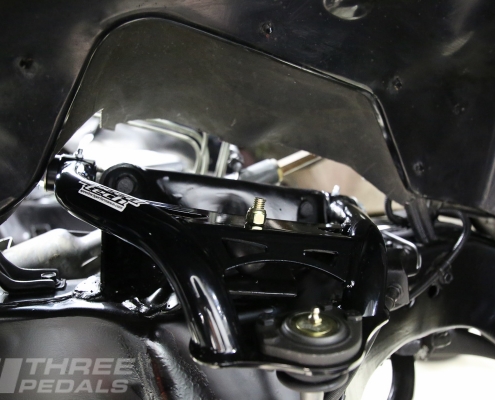
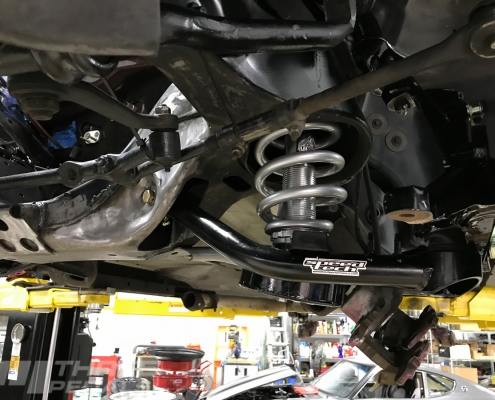
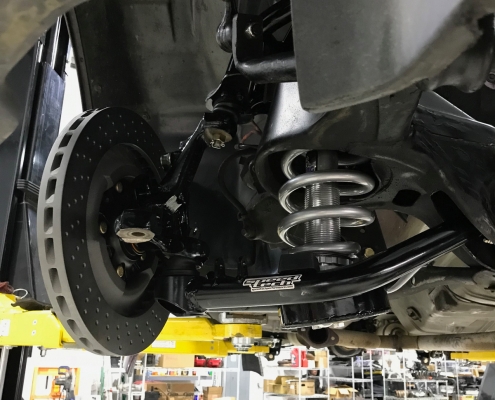
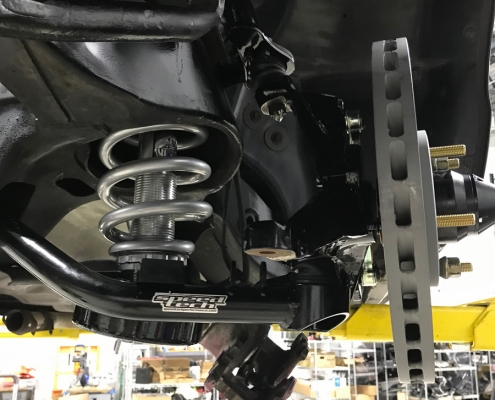
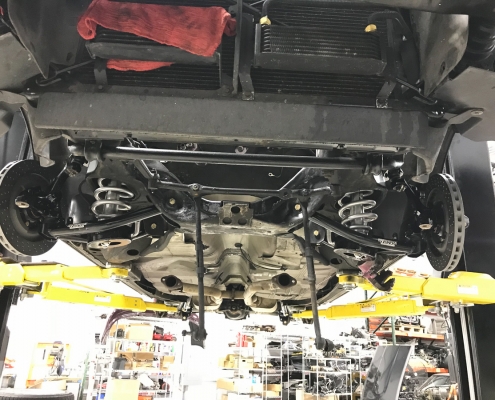
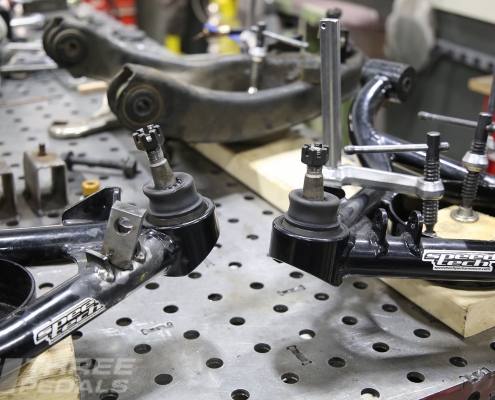
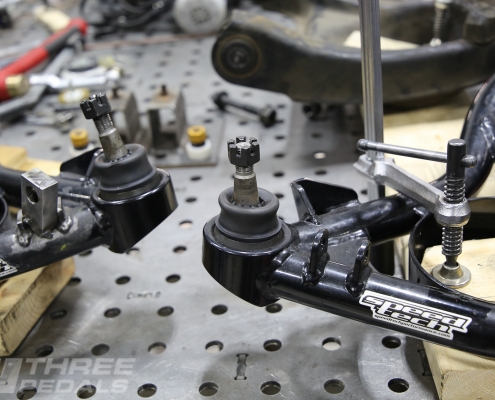
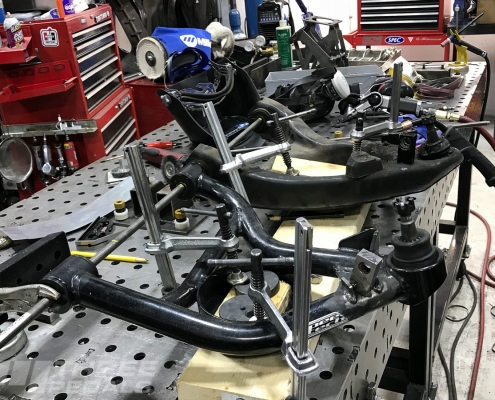
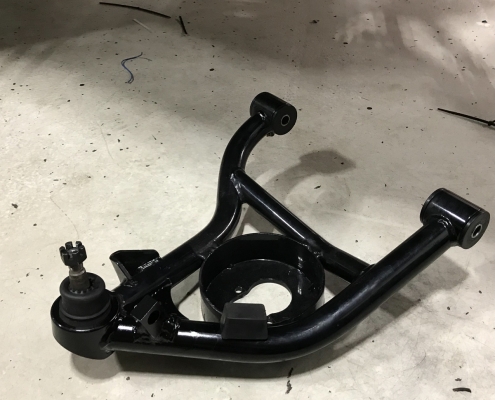
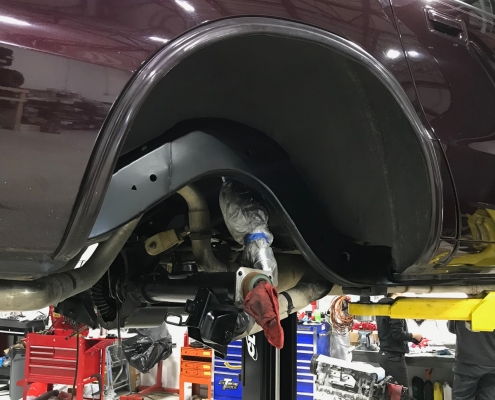
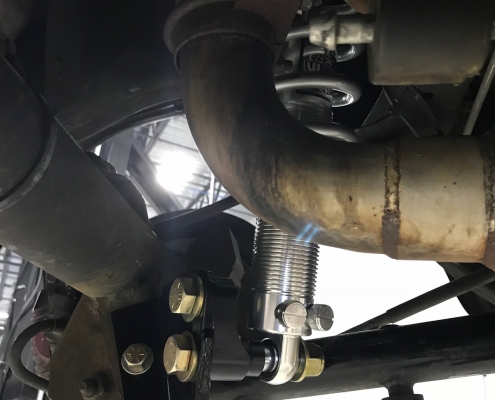
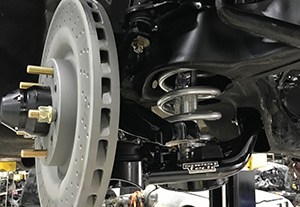
Step 1 for control: coil over suspension. Step 2: giant brakes. Here we cover step 1. We installed Speedtech Performance’s coil over conversion front and rear, featuring Speedtech’s proprietary control arms and mounting brackets along with Viking Performance double adjustable shocks.
Once installed, a performance alignment is a must and we highly recommend corner balancing at the same time. Starting with the alignment, Speedtech’s front upper control arms provide more caster – we’re running 8.5 degrees – which in turn gives you greater negative camber gain while turning. This gives you a solid contact patch on your outside front tire when cornering and it makes a big difference. Corner balancing is covered in our coil over tech article, and in sum, with a scale under each tire, minute adjustments are made in shock height in order to balance the car, helping it to fling side to side on the autocross like a sports car should.
And we know how to make these cars handle. We’ve tried all the setups out there and recently tried out QA1’s new handling kit for Hot Rod Magazine.
If you’re looking to get your car handling – whether you’re turning your own wrenches or having someone do the work – please start the conversation here.
Front Suspension
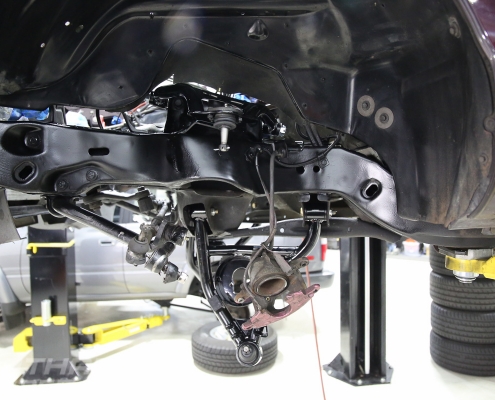
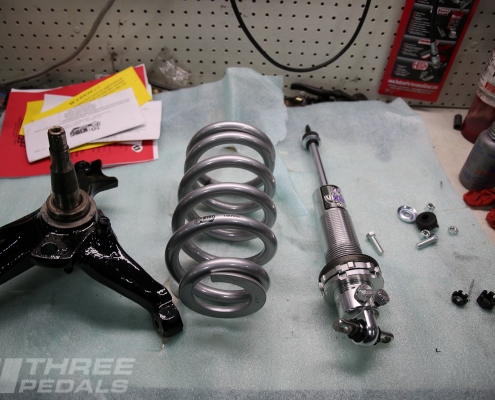
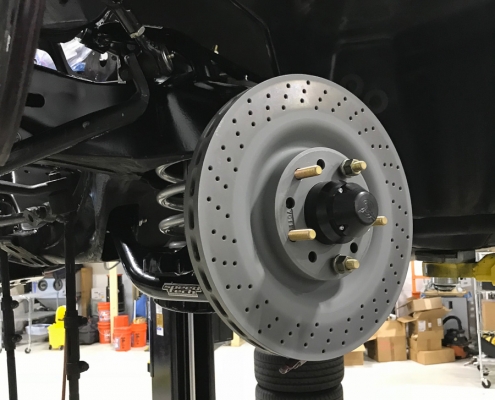
Installing the front suspension is pretty straight forward. Assembling the coil overs is sure to elicit grins and they’re much easier to install as compared to the stock suspension springs. We installed spindles that were already modified for the big brakes and powder coated.
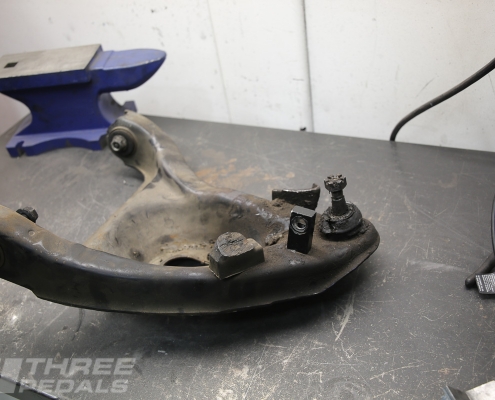
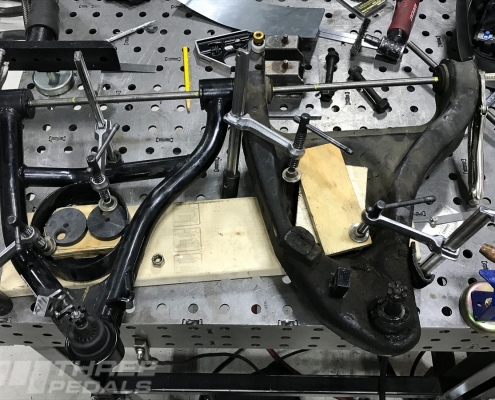
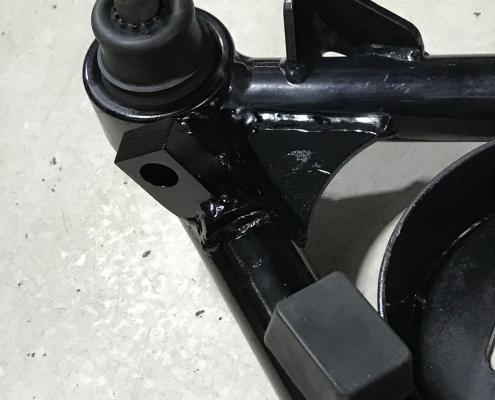
We did custom fabrication on the lower arms – the owner, for good reason, wanted to retain his vintage Herb Adams anti-sway bar and the front bar uses solid endlinks with ball joint ends. The factory setup uses a long bolt that goes through the lower control arm. Speedtech ups the game with a double shear mount that works with their endlinks, but the Herb Adams ones have a totally different mount. So we sliced off the Speedtech endlink brackets and re-used the Herb Adams blocks that were bolted to the factory arms.
Rear Suspension
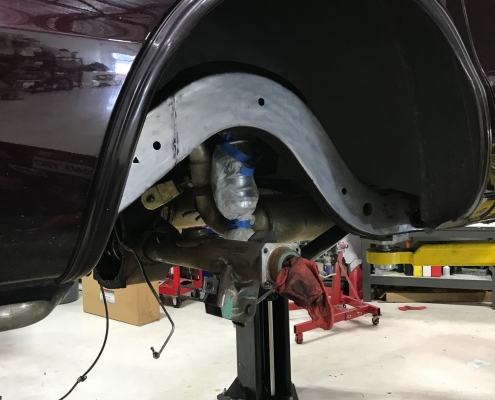
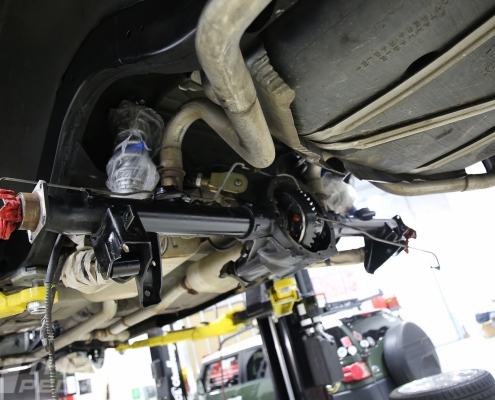
Installing the rear suspension is also straight forward. Speedtech’s fabricated lower shock mount (one per side) gets bolted to the axle housing, and then you drill holes in the axle housing and add more bolts. This provides a solid foundation to attach each coil over assembly, while ensuring proper geometry. The brackets provide for three different height settings, so in combination with about 2-1/2″ of adjustment at the coil over you get quite a range over which you can dial in your height to your taste.
More Build Articles
 https://threepedals.com/wp-content/uploads/2018/09/Three_Pedals_1996_Impala_GenV_LT1_retrofit_cover.jpg
207
300
Josh Korsower
https://threepedals.com/wp-content/uploads/2017/09/three-pedals-logo-2017.svg
Josh Korsower2018-09-02 08:18:032018-09-03 10:00:01Retrofitting the Gen V LT1 Engine
 https://threepedals.com/wp-content/uploads/2018/09/Three_Pedals_1996_Impala_GenV_LT1_coilover_cover.jpg
207
300
Josh Korsower
https://threepedals.com/wp-content/uploads/2017/09/three-pedals-logo-2017.svg
Josh Korsower2018-09-02 08:18:032018-09-03 10:21:55Coil Over Suspension
https://threepedals.com/wp-content/uploads/2018/09/Three_Pedals_1996_Impala_GenV_LT1_coilover_cover.jpg
207
300
Josh Korsower
https://threepedals.com/wp-content/uploads/2017/09/three-pedals-logo-2017.svg
Josh Korsower2018-09-02 08:18:032018-09-03 10:21:55Coil Over SuspensionInteresting links
Here are some interesting links for you! Enjoy your stay :)Pages
- Big Brake Kits
- Clutch Play
- Factory Seconds
- Our Builds
- Shift Knobs
- Shop
- Wholesale Login
- Wholesale Store
- Dakota Digital HDX Instrument System Specifications
- Dakota Digital RTX Instrument System Specifications
- Dakota Digital VHX Instrument System Specifications
- Dakota Digital VFD Instrument System Specifications
- Jobs
- Pedals & Drivetrain Swaps
- Trucks
- New Products
- SSubtle Take
- Welcome to Three Pedals!
- Car API
- Events
- 1996 Impala Console
- G-Body Request a Quote
- Request a Quote
- Shaken & Stirred
- Car Craft Malibu
- Car Craft Malibu Build Products
- Conversion Kits
- Products
- Shop Online
- Rides Gallery
- About Us
- Services
- Blog
- Contact
- Info
- Cart
- Shipping & Returns
- Privacy Policy
- Terms of Use
- Checkout
- My Account
- Vehicle Search
- Cart
Categories
- 1961 Impala
- 1973 Oldsmobile Cutlass
- 1977 Mercedes 6.9
- 1977 Toyota FJ40
- 1988 Cutlass
- 1989 Pontiac Safari
- 1991 Jeep Wrangler
- 1992 Land Rover D90
- 1995 Caprice 9C1 6 Speed
- 1995 Chevrolet Impala SS
- 1996 Impala Gen V LT1
- 2007 BMW 328xi
- 2012 Dodge Charger SRT8
- 2015 Chevy SS
- 2015 Mustang GT
- 2017 Jeep Rubicon Recon Unlimited
- 2017 Toyota Tacoma
- 499HP Caprice
- About Press
- Blog
- CC/Malibu
- CC/Malibu Blog
- CC/Malibu Video
- FAQ
- Press
- Projects
- Shaken Blog
- Shaken Cool Kids
- Shaken Press
- Shaken Video
- T56 Teardown
- Technical
- Three Pedals #14
- Three Pedals #16
