 https://threepedals.com/wp-content/uploads/2019/06/Three_Pedals_Shaken_and_Stirred_sale_cover.jpg
207
300
Josh Korsower
https://threepedals.com/wp-content/uploads/2017/09/three-pedals-logo-2017.svg
Josh Korsower2019-07-15 11:22:372021-07-12 19:19:11Shaken & Stirred is Not For Sale
https://threepedals.com/wp-content/uploads/2019/06/Three_Pedals_Shaken_and_Stirred_sale_cover.jpg
207
300
Josh Korsower
https://threepedals.com/wp-content/uploads/2017/09/three-pedals-logo-2017.svg
Josh Korsower2019-07-15 11:22:372021-07-12 19:19:11Shaken & Stirred is Not For SaleThe LS3 engine in our wagon, Shaken & Stirred, started life in a 2010 Camaro SS and was rated at 426 HP. That’s not bad, but a woody wagon with a 6 speed and coil over suspension deserves more, right? Not convinced yet? OK how about some facts – on a purely mathematical basis, at 3,859 pounds the Camaro carries 9 pounds per HP (lb/HP). Our wagon weighs 4,250 pounds, and without more power we’d be saddled with 10 lb/HP. Not fair!
There are lots of options to increase power, and though we do play with turbos and superchargers, for the wagon we went with a killer camshaft and tune from Mast Motorsports. Their “SS” camshaft and valvespring package is good for 540 HP on an LS3 when properly tuned – 7.9 lb/HP is starting to sound much better.
A free-flowing intake and exhaust are needed to make that power, and we’ve got that covered. To realize the full potential of this cam, Mast supplied one of their M90 ECUs and wiring harness with a pre-calibrated tune. We did not change the stock 6.2 liter (376 cubic inch) displacement, though with a bigger budget we certainly would have.
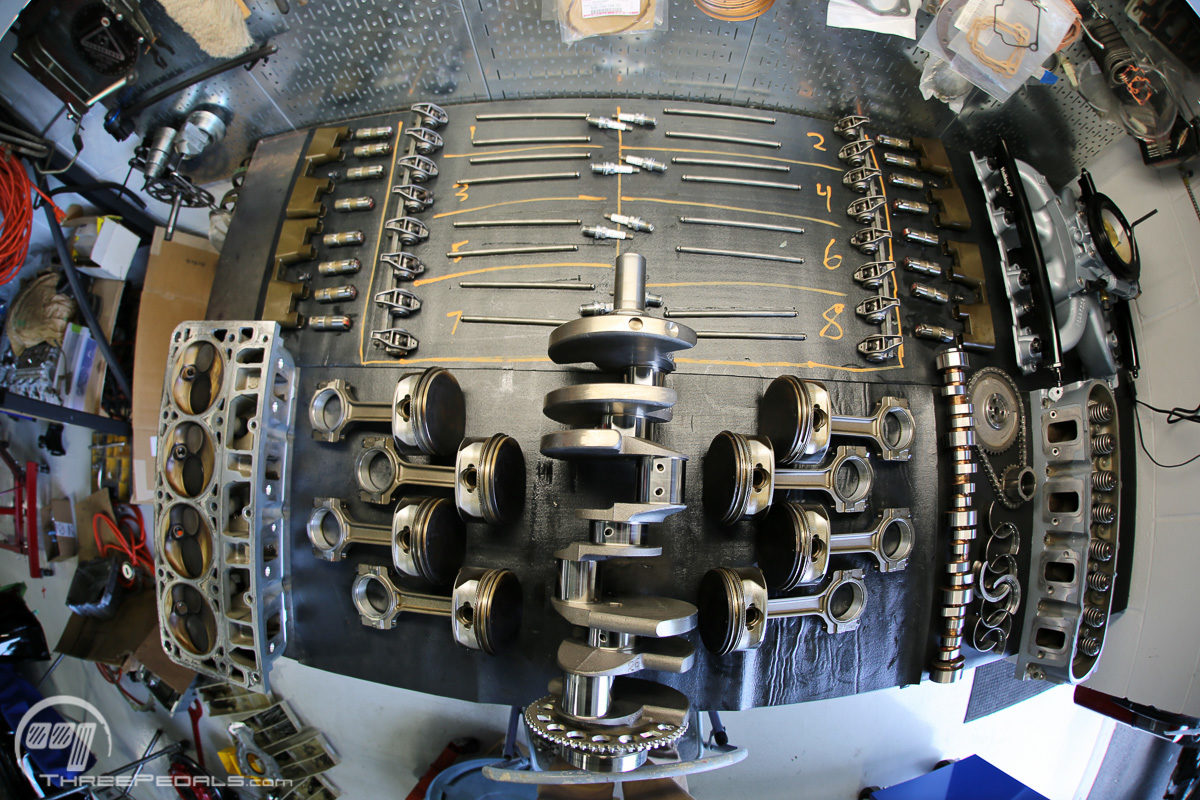
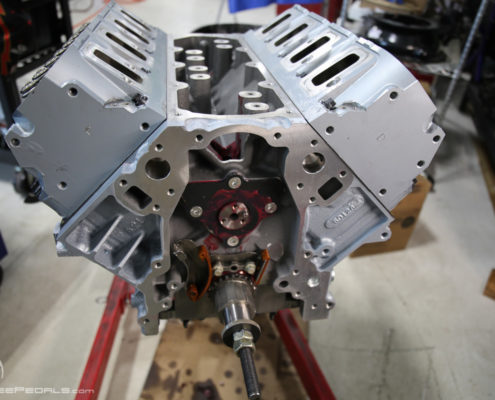
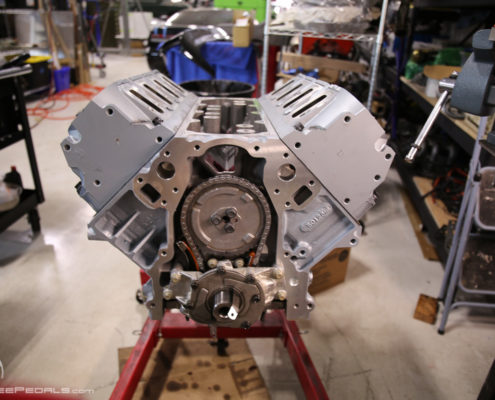
Turning to the rebuild, we discovered a crack in our used block from accident damage and we replaced it with a brand new block from GM, part #12623967, which weighs 105 lbs. straight off the pallet. Everything else connected to and inside the LS3 was in great shape, but knowing we’d be driving the snot out of the wagon having a great time with the wagon, we went with some upgrades while we were there.
Before getting into the new block, we had it painted in a 60’s Pontiac engine color. With everything apart and cleaned, measurements were taken, and then some more measurements were taken. Then we checked some of those measurements again. LS engines tend to have fairly consistent tolerances, and all of our new and used parts were within spec. With acceptable ranges of, for example 2.558” – 2.559”, you suddenly find yourself with the need to read measurements into the ten thousandths of an inch – the 4th digit to the right of the decimal place. Our crankshaft journals measured between 2.5585” and 2.5589”, and each one was measured a few times to eliminate measurement inaccuracies.
To give you more of a sense of the accuracy required on an engine, the main bearing clearance – the gap between the main bearings and the crankshaft journals – is specified at 0.0015” – 0.0020”, about the width of a human hair. This is the gap inside which your motor oil is swirling. Among other symptoms, go too loose here and you won’t make sufficient oil pressure; too tight and you’ll burn up your bearings. So, measuring one more time won’t hurt. Come to think of it, one of those Chipotle hairnets wouldn’t hurt either.
With everything confirmed to be in spec, the new block received a thorough cleaning with every accessible crevice and passage brushed with soapy water and hosed down. Over and over. When done, compressed air chased the water away. Though the block is aluminum, the cylinder liners are iron, so a coat of WD40 on those keeps the flash rust away. Same routine for the rest of the parts, but we used the parts washer instead of soap and water.
Next it was time to assemble everything. Our first upgrade was to the connecting rod bolts, replacing the factory pieces with ARP bolts. Connecting rod bolts are the most stressed in an engine, subjected to the push and pull forces of the piston travelling up and down. At 6,500 RPM, pistons are going up and down 108 times per second. So strong bolts are good. ARP part #234-6301 is made from ARP2000 steel alloy, with 200,000 psi yield strength and 220,000 psi tensile strength.
The LS3’s fractured cap rods do not require rebushing when rod bolts are changed, and in fact you can’t rebush them. The old bolts tap out and the new ARP bolts simply replace them. We left our pistons attached to our connecting rods, and each set weighed in at 1,289 – 1,290 grams. Naturally, we gave the pistons a good cleaning first, those tops sure do get dirty.
Since these bolts are so stressed, don’t just make ‘em snug! And don’t just torque them down with a torque wrench. Rather, the ideal way to tighten these is to snug them until they stretch a certain amount. Yes, the bolts stretch – not something most people usually think about, but now you know. ARP specs a stretch range of 0.0065” – 0.0070”, which generally meant about 45 – 50 lb/ft of torque. But the key is to tighten them until the proper stretch is achieved, not until you reach a certain torque reading. And don’t forget the moly lube ARP supplies on the threads as well as the faces of the bolts and nuts that contact the connecting rod.
We replaced the factory piston rings with Total Seal’s gapless top ring set, part #M2925. This includes the top ring, second ring, and oil control ring. The top and second rings were each file fit to their respective cylinder, with the top gap set at 0.018” and the second gap set at 0.022”.
Clevite coated bearings were used, part #MS2199HK for the crankshaft mains and part #CB663HNK for the connecting rods. The block came with cam bearings already installed, so we kept those in place. Plenty of ARP Ultra-Torque assembly lube is used on the bearing surfaces, part #100-9911 for the industrial vat, or part #100-9909 for the one-time quantity.
We reused the stock crankshaft main caps and bolts, which are torqued down in a special sequence, in stages. On LS engines, the crankshaft must be preloaded to align the thrust bearing surfaces on the #3 main bearings. Pretty similar to a good old Chevy small block, except for the 10 cross bolts that go through the side of the block and into each side of each main cap for extra strength and rigidity.
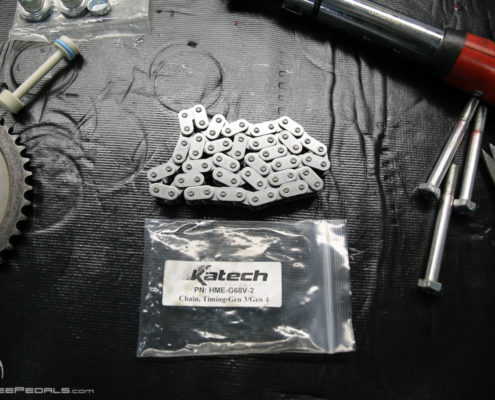
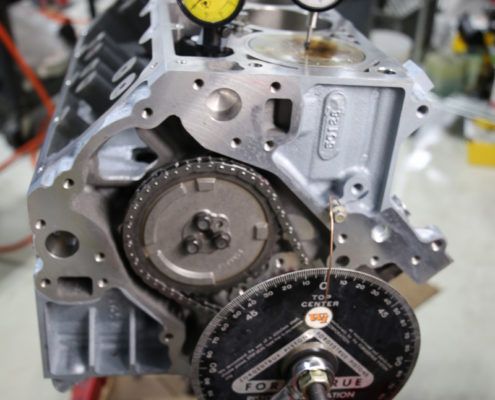
The camshaft goes in next, carefully to be sure not to nick the lobes or bearings, and as with the crank bits, liberally coated with ARP assembly lube. We replaced the stock timing chain with a Katech C5-R piece, part #HME-G68V-2, and reused the stock gears and tensioner. This is the exact same chain Katech uses on their Corvette Racing C5-R, C6.R, and C7.R, and it’s made it through the 24 Hours of Le Mans and the 24 Hours of Daytona. OK, should be good enough for us!
We double checked the cam timing relative to the #1 piston, and all checked out. Next the lifters and lifter retainers go in.
The stock pushrods aren’t the strongest, and we plan to rev this sucker, so we added Comp Cams 0.080” wall chromoly pushrods, part #7955-16. The stock rockers rotate on some crappy pieces of metal probably referred to as “bearing type material” in factory documentation. We could go with all new roller rocker arms, but Comp Cams makes an affordable upgrade kit, part #13702-KIT, that reuses the stock arms, but replaces the faux bearings with captured roller trunnion bearings for improved stability and stiffness, particularly at the higher revs.
LS head bolts are of the “torque-to-yield” variety, which is engineering speak for “toss-in-bin” after the first use. Instead of a new set of similar bolts, we went with ARP part #134-3610, which are reusable. The LS head bolt holes are blind, so a failure to purge all moisture from them prior to installing the bolts can lead to bad things; so we purged. As with the crankshaft, there is a particular sequence and stages for torqueing the head bolts.
Finishing off the engine, we went a bit nuts with ARP’s beautiful 12 point stainless steel bolts everywhere we could fit them. Inside our shop these are about as close to jewelry as you’ll find.
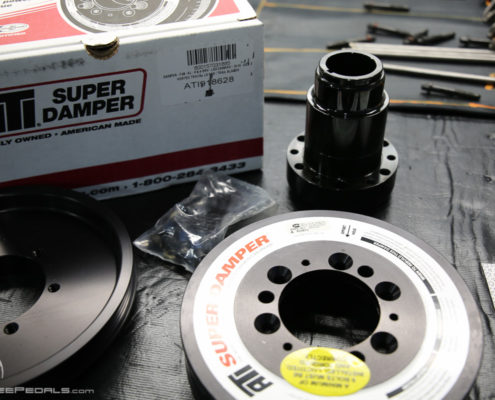
On the bottom side of our engine we’re running a Mast Motorsports oil pan for the requisite clearance around our frame crossmember – most retrofit swaps will require a similar oil pan for clearance. On the front of the crank we’re running an ATI damper to help dampen all the extra frequencies buzzing around. We started with part #918628 but switched to #918629 with a slightly smaller diameter pulley, in order to slow down our power steering pump.
Having flung an LS damper off our engine at 5,000 RPM, for racy applications we drill the crankshaft in order to pin the damper to the crank, much like a keyway helps to eliminate rotation. ATI part #918993 makes this a straight forward job, and a great investment for those that race. A giant ARP bolt, part #234-2503, keeps the damper and hub in place, helped by some red Loctite.
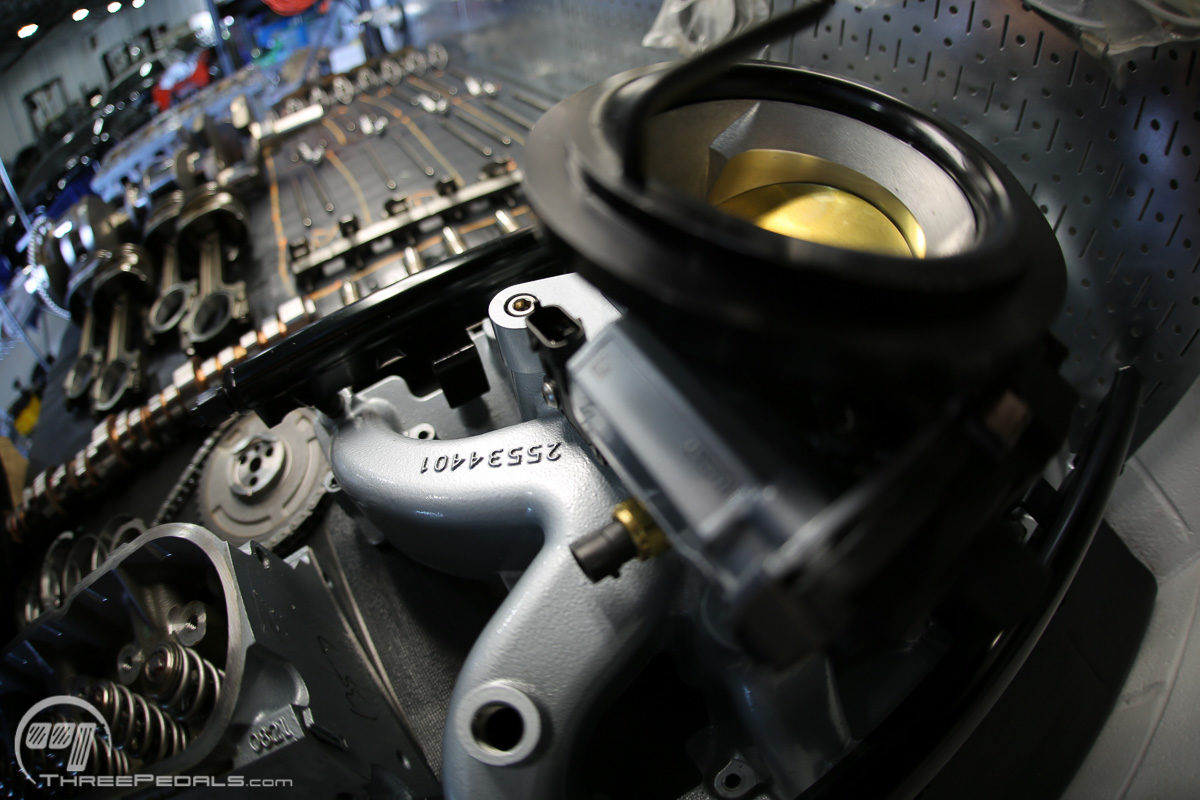
On top, we’ve got a Chevrolet Performance intake designed to accept a 4150 style carburetor. But don’t worry, part #25534416 has fuel injector bosses as well. Mast Motorsports came to the rescue again, this time with their Old Skool adapter (part #401-012). The Old Skool piece helps you fake a carb with a truck drive by wire throttle body (in our case, one from an L92) and performs two functions. On the intake manifold side, the Old Skool piece adapts the 4150 mount to the LS throttle body. On the air cleaner side, it adapts the LS throttle body to a 5 ¼” diameter circle, perfect for old school skool air cleaner assemblies, like a classic 14” round air cleaner, or better yet a stock shaker intake base from a 70’s Trans Am.
We finished off the intake with Holley fuel rails, part #534-209, and made brackets to space them just right with our stock fuel injectors.
So there’s our engine.
 https://threepedals.com/wp-content/uploads/2019/06/Three_Pedals_Shaken_and_Stirred_sale_cover.jpg
207
300
Josh Korsower
https://threepedals.com/wp-content/uploads/2017/09/three-pedals-logo-2017.svg
Josh Korsower2019-07-15 11:22:372021-07-12 19:19:11Shaken & Stirred is Not For Sale
 https://threepedals.com/wp-content/uploads/2019/05/Shaken_trolls_370Z_OUSCI_cover.png
207
300
Josh Korsower
https://threepedals.com/wp-content/uploads/2017/09/three-pedals-logo-2017.svg
Josh Korsower2019-07-14 12:46:522019-07-14 21:51:47Shaken Trolls 370Z at OUSCI
 https://threepedals.com/wp-content/uploads/2019/05/Shaken-ISSCA-2018-small.jpg
208
300
Josh Korsower
https://threepedals.com/wp-content/uploads/2017/09/three-pedals-logo-2017.svg
Josh Korsower2019-05-27 06:49:522019-05-27 19:14:237 Person Wagon Autocross
 https://threepedals.com/wp-content/uploads/2018/06/ISSCA-mid-ohio-cover-small.jpg
207
300
Josh Korsower
https://threepedals.com/wp-content/uploads/2017/09/three-pedals-logo-2017.svg
Josh Korsower2019-05-27 04:36:522019-05-27 19:08:57Shaken Hits Mid Ohio Sports Car Course
 https://threepedals.com/wp-content/uploads/2018/05/Three_Pedals_Shaken_and_Stirred_Speedhut_cov-1.jpg
206
300
Josh Korsower
https://threepedals.com/wp-content/uploads/2017/09/three-pedals-logo-2017.svg
Josh Korsower2018-06-13 11:36:522019-07-19 15:15:08Speedhut Custom Gauges
 https://threepedals.com/wp-content/uploads/2018/05/Three_Pedals_Shaken_and_Stirred_Slowmo_Burnout_cover.png
207
300
Josh Korsower
https://threepedals.com/wp-content/uploads/2017/09/three-pedals-logo-2017.svg
Josh Korsower2018-05-31 06:24:522018-05-31 08:28:33Slow-Mo Burn-Mo
 https://threepedals.com/wp-content/uploads/2018/05/Three_Pedals_Shaken_and_Stirred_Holley_cov.jpg
207
300
Josh Korsower
https://threepedals.com/wp-content/uploads/2017/09/three-pedals-logo-2017.svg
Josh Korsower2018-05-31 06:24:522019-07-19 15:15:40Holley Performance
 https://threepedals.com/wp-content/uploads/2018/05/Three_Pedals_Shaken_and_Stirred_GM-EFI_cov.jpg
207
300
Josh Korsower
https://threepedals.com/wp-content/uploads/2017/09/three-pedals-logo-2017.svg
Josh Korsower2018-05-31 06:24:522019-07-19 15:16:23GM EFI Magazine
 https://threepedals.com/wp-content/uploads/2018/05/Three_Pedals_Shaken_and_Stirred_Hoonigan_cover_post.png
207
300
Josh Korsower
https://threepedals.com/wp-content/uploads/2017/09/three-pedals-logo-2017.svg
Josh Korsower2018-05-21 11:39:522018-05-31 09:01:03Shaken the Hoonigan
 https://threepedals.com/wp-content/uploads/2018/03/Three_Pedals_Shaken_and_Stirred_2017-192.jpg
207
300
Josh Korsower
https://threepedals.com/wp-content/uploads/2017/09/three-pedals-logo-2017.svg
Josh Korsower2018-03-18 10:48:522018-05-10 21:59:24Torque versus Horsepower, Illustrated
 https://threepedals.com/wp-content/uploads/2017/09/BurnoutCover.jpg
207
295
Josh Korsower
https://threepedals.com/wp-content/uploads/2017/09/three-pedals-logo-2017.svg
Josh Korsower2017-09-12 12:28:392019-07-14 21:54:522017 Holley LS Fest Burnout Challenge Champion
 https://threepedals.com/wp-content/uploads/2017/09/interior-screenshot-cover.jpg
207
295
Josh Korsower
https://threepedals.com/wp-content/uploads/2017/09/three-pedals-logo-2017.svg
Josh Korsower2017-09-07 12:22:152018-05-10 21:59:33Wagon Interior Video
 https://threepedals.com/wp-content/uploads/2017/09/dashfeatured.jpg
207
295
Josh Korsower
https://threepedals.com/wp-content/uploads/2017/09/three-pedals-logo-2017.svg
Josh Korsower2017-09-07 11:37:372018-05-10 21:58:44Shaken & Stirred Interior Gets Some Love
 https://threepedals.com/wp-content/uploads/2017/09/Three_Pedals_Burnout_Cover.jpg
207
300
Josh Korsower
https://threepedals.com/wp-content/uploads/2017/09/three-pedals-logo-2017.svg
Josh Korsower2017-09-01 10:40:532018-05-10 21:59:39Wagon Burn Out
 https://threepedals.com/wp-content/uploads/2017/07/ExhaustCoverVidSmall.jpg
207
300
Josh Korsower
https://threepedals.com/wp-content/uploads/2017/09/three-pedals-logo-2017.svg
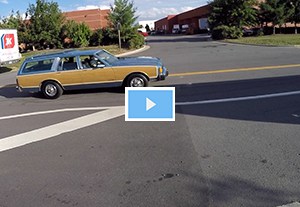
Josh Korsower2017-07-08 19:13:402018-05-10 21:59:44540 Horsepower Through Our Custom 3″ Stainless Steel Dual Exhaust
https://threepedals.com/wp-content/uploads/2017/07/ExhaustCoverVidSmall.jpg
207
300
Josh Korsower
https://threepedals.com/wp-content/uploads/2017/09/three-pedals-logo-2017.svg
Josh Korsower2017-07-08 19:13:402018-05-10 21:59:44540 Horsepower Through Our Custom 3″ Stainless Steel Dual ExhaustInteresting links
Here are some interesting links for you! Enjoy your stay :)Pages
- Big Brake Kits
- Clutch Play
- Factory Seconds
- Our Builds
- Shift Knobs
- Shop
- Wholesale Login
- Wholesale Store
- Dakota Digital HDX Instrument System Specifications
- Dakota Digital RTX Instrument System Specifications
- Dakota Digital VHX Instrument System Specifications
- Dakota Digital VFD Instrument System Specifications
- Jobs
- Pedals & Drivetrain Swaps
- Trucks
- New Products
- SSubtle Take
- Welcome to Three Pedals!
- Car API
- Events
- 1996 Impala Console
- G-Body Request a Quote
- Request a Quote
- Shaken & Stirred
- Car Craft Malibu
- Car Craft Malibu Build Products
- Conversion Kits
- Products
- Shop Online
- Rides Gallery
- About Us
- Services
- Blog
- Contact
- Info
- Cart
- Shipping & Returns
- Privacy Policy
- Terms of Use
- Checkout
- My Account
- Vehicle Search
- Cart
Categories
- 1961 Impala
- 1973 Oldsmobile Cutlass
- 1977 Mercedes 6.9
- 1977 Toyota FJ40
- 1988 Cutlass
- 1989 Pontiac Safari
- 1991 Jeep Wrangler
- 1992 Land Rover D90
- 1995 Caprice 9C1 6 Speed
- 1995 Chevrolet Impala SS
- 1996 Impala Gen V LT1
- 2007 BMW 328xi
- 2012 Dodge Charger SRT8
- 2015 Chevy SS
- 2015 Mustang GT
- 2017 Jeep Rubicon Recon Unlimited
- 2017 Toyota Tacoma
- 499HP Caprice
- About Press
- Blog
- CC/Malibu
- CC/Malibu Blog
- CC/Malibu Video
- FAQ
- Press
- Projects
- Shaken Blog
- Shaken Cool Kids
- Shaken Press
- Shaken Video
- T56 Teardown
- Technical
- Three Pedals #14
- Three Pedals #16
