 https://threepedals.com/wp-content/uploads/2019/08/Three_Pedals_CC_Malibu_LSFE19_burnout_cov.jpg
207
300
Josh Korsower
https://threepedals.com/wp-content/uploads/2017/09/three-pedals-logo-2017.svg
Josh Korsower2019-09-23 07:40:372019-09-25 19:36:18LS Fest X Burnout Contest
https://threepedals.com/wp-content/uploads/2019/08/Three_Pedals_CC_Malibu_LSFE19_burnout_cov.jpg
207
300
Josh Korsower
https://threepedals.com/wp-content/uploads/2017/09/three-pedals-logo-2017.svg
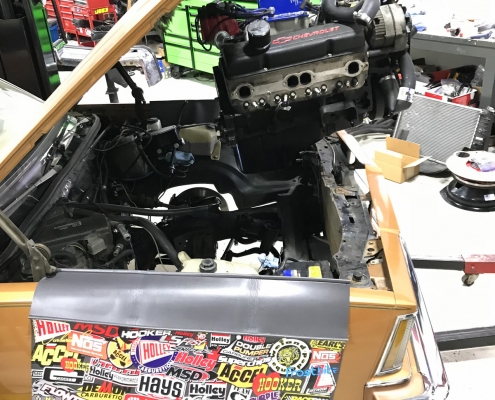
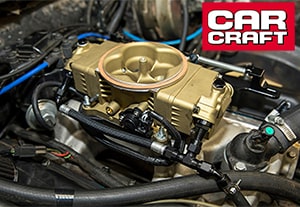
Josh Korsower2019-09-23 07:40:372019-09-25 19:36:18LS Fest X Burnout ContestThe small block engine powering the CC/Malibu was pretty stout, putting out about 400 HP at the flywheel. We previously upgraded the engine from carbureted to fuel injected using Holley’s Terminator Stealth EFI kit, which uses a throttle body that looks like a carburetor, but hides 4 fuel injectors and a few sensors needed for the EFI.
But of course, more power is better. And of course, we love LS engines. So we set out to see how we could slip in an LS without getting rid of the EFI system we just installed.
And since even more power is even better, why not add a turbo to the mix? Here’s the story of how we brought it all together.
If you need help with your ’78 – ’88 A/G-Body build please don’t hesitate to contact us.
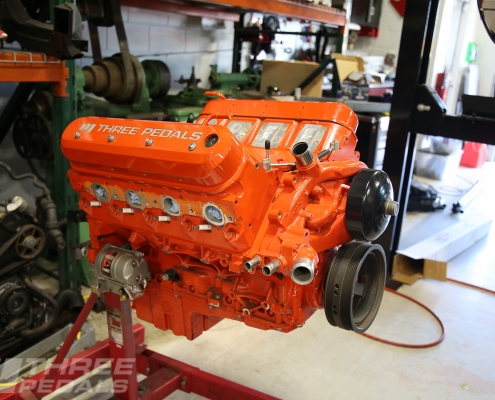
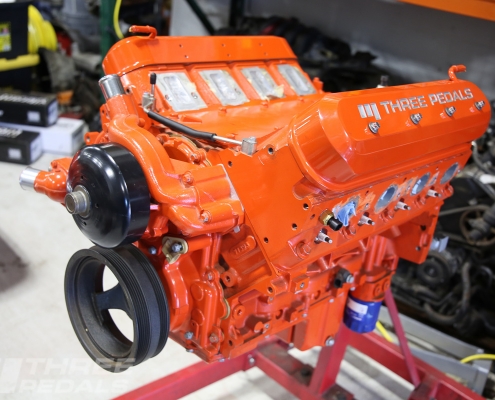
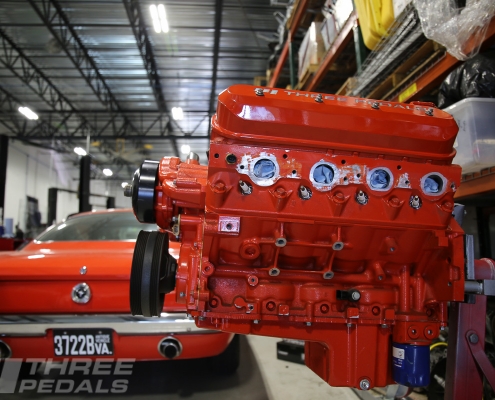
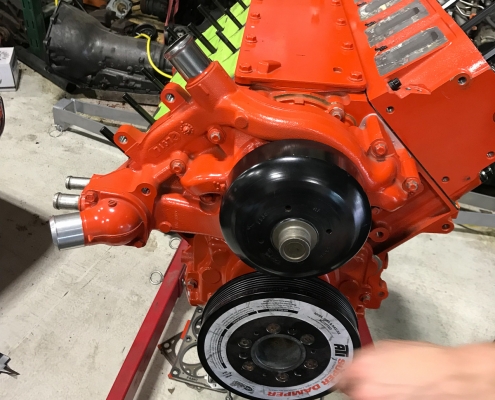
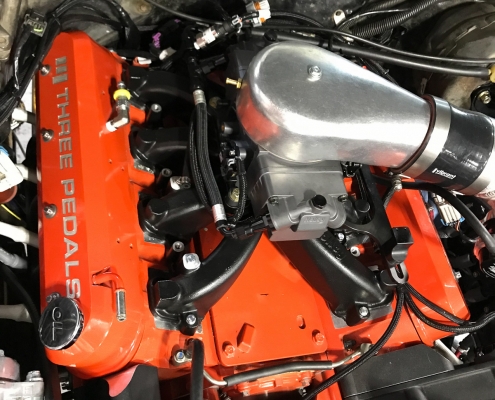
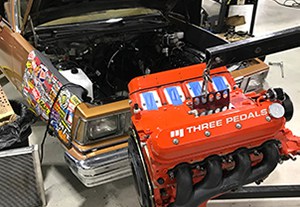
Choosing the LS engine was easy as we had a crate LS3 engine kicking around the shop, already painted Chevy engine orange. It was destined for a ’61 Impala but that got put on the back burner, and engines prefer running to collecting dust so hey. By using Holley’s LS carburetor intake manifold, we could reuse the EFI throttle body from the small block and even confuse a few people with our fake carburetor look. (We pulled a similar trick with our wagon, Shaken & Stirred, running a GM manifold and an adapter to mate a drive-by-wire throttle body to a carburetor intake.)
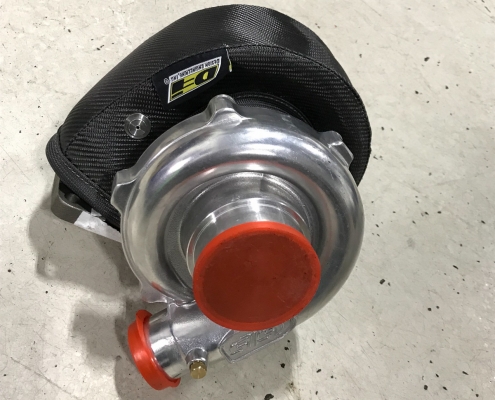
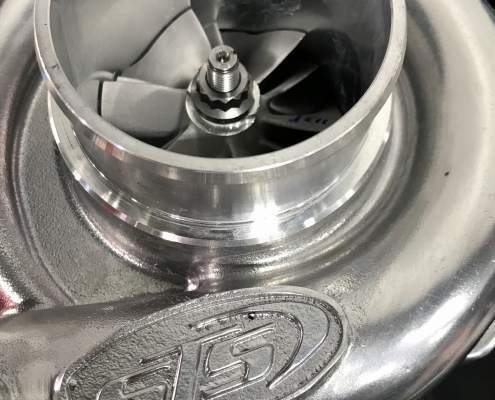
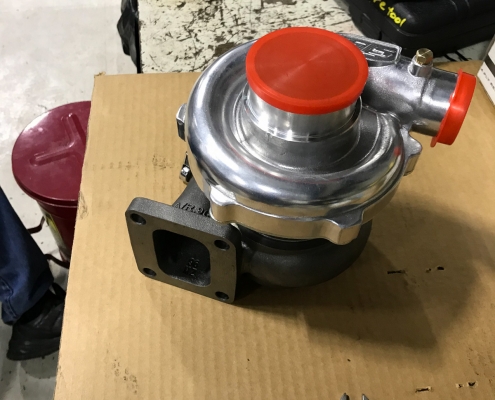
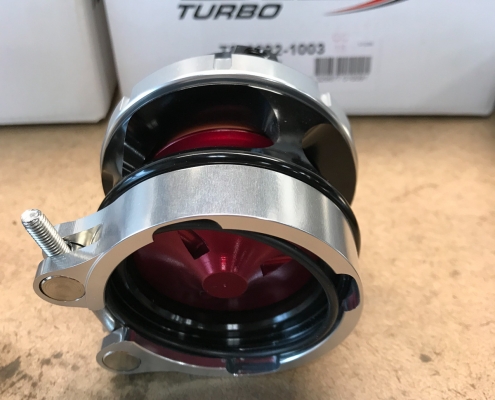
Turning to the turbo, STS built their name with remote mount turbo kits – remote as in not under the hood. One benefit of a remote mount turbo is that underhood temperatures are kept lower without a turbo under the hood – with exhaust gas spinning its turbine, turbochargers get hot! Doubters thought that a remote mount setup would introduce turbo lag – the dreaded delay between mashing the throttle and the feeling of being pushed back in your seat as the turbo builds and delivers boost. However, STS proved the doubters wrong; with a well-designed system, there is no appreciable difference in lag with a remote mount kit.
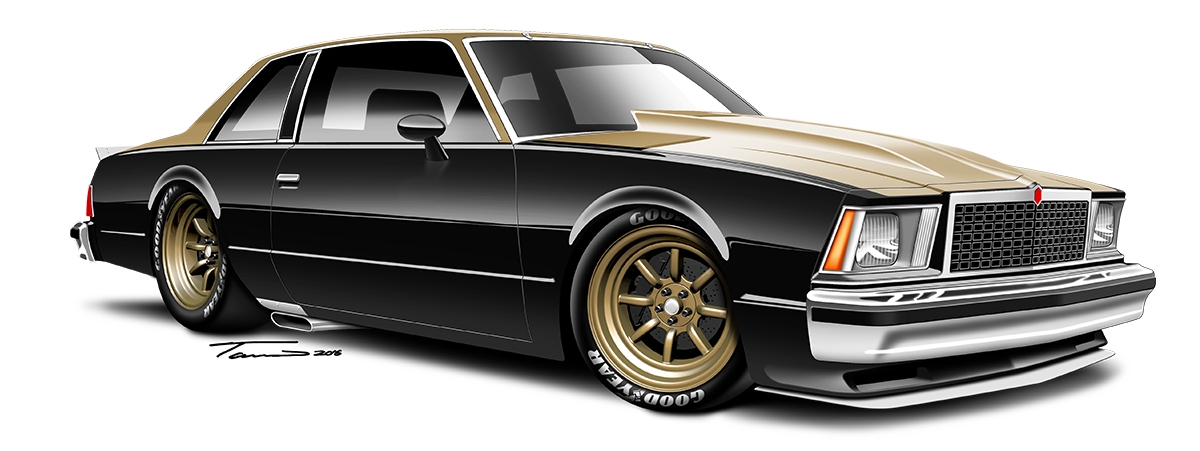
Back to the Malibu – Tavis Highlander’s wicked rendering of the Malibu as a Smokey Yunick ’67 Chevelle tribute stole our hearts and the direction was set (and you can be tempted by more of Tavis’s work here). We thought a hidden turbo would’ve made Smokey smile, so STS’s new universal remote mount turbo kit was just the ticket.
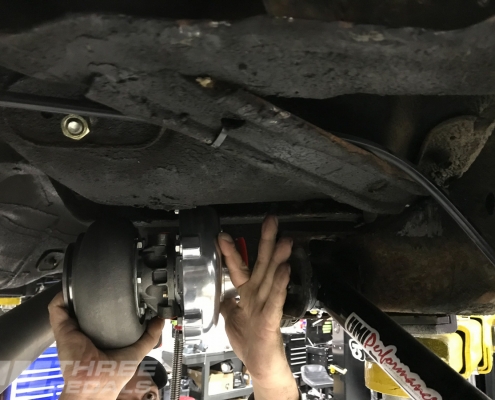
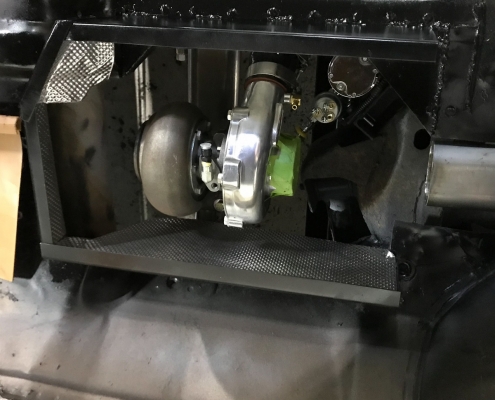
The LS part of this whole deal was pretty straight forward, so we first focused on locating the turbo. With the car on the lift we picked up the turbo and held it up in a few different spots. If we placed it at the very back of the car behind the rear axle, the spare tire well on the passenger side takes up a lot of space. And we’re not promising anything, but we kinda had to build a single turbo system that could be mirror imaged with a twin, just in case we decide to do that. Just in case.
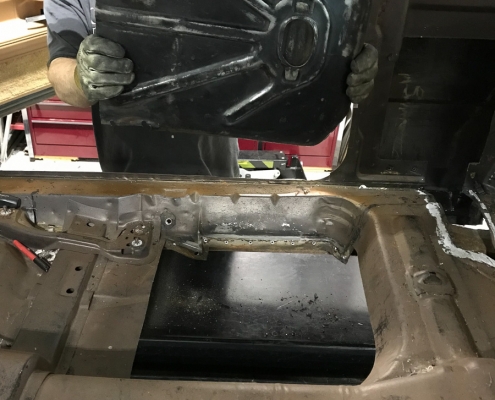
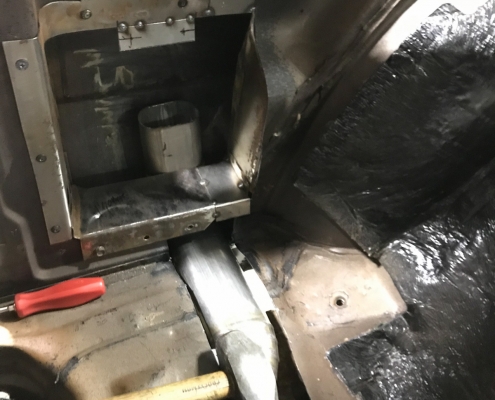
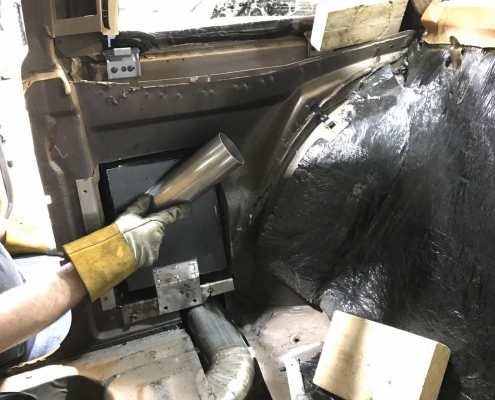
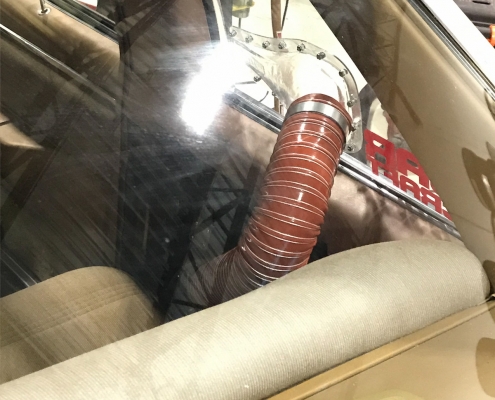
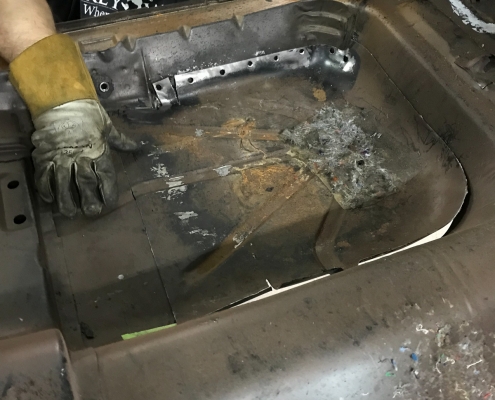
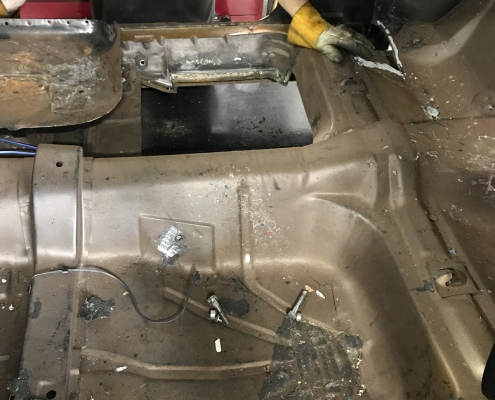
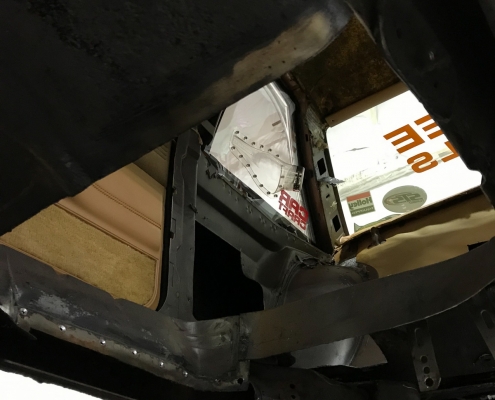
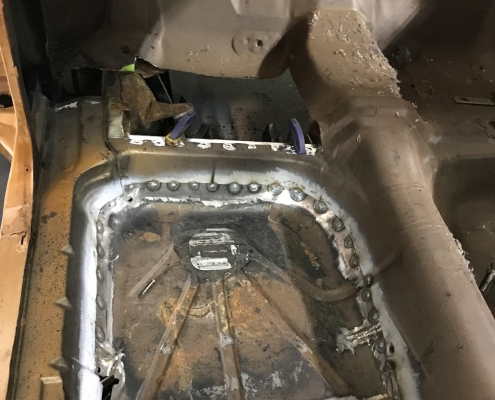
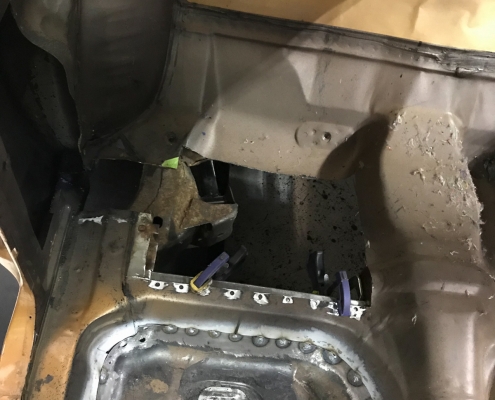
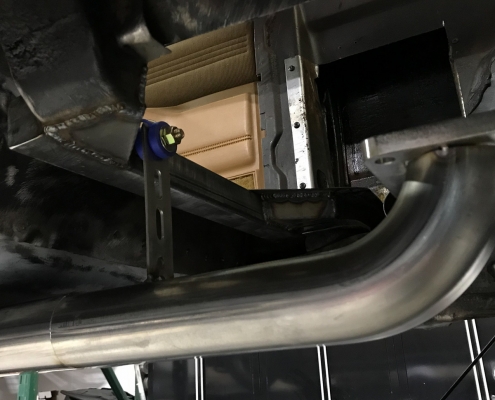
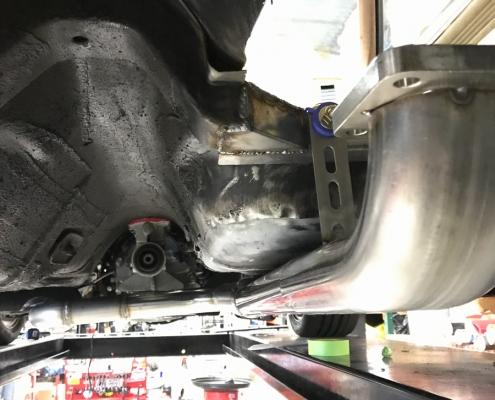
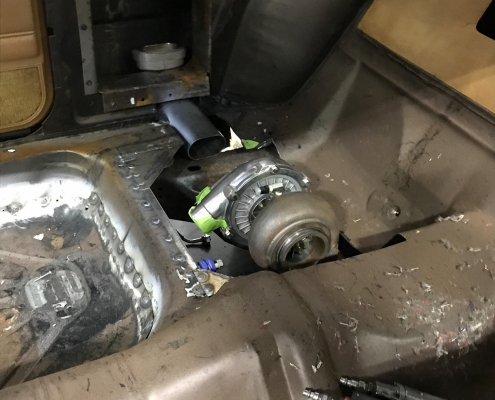
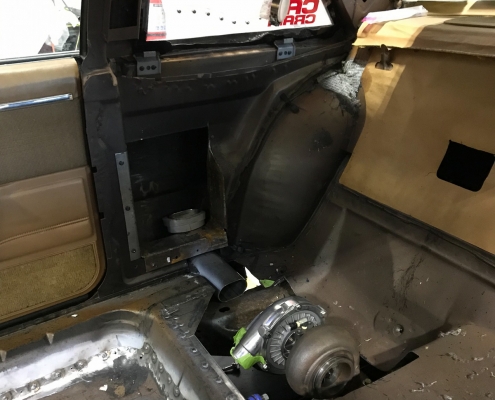
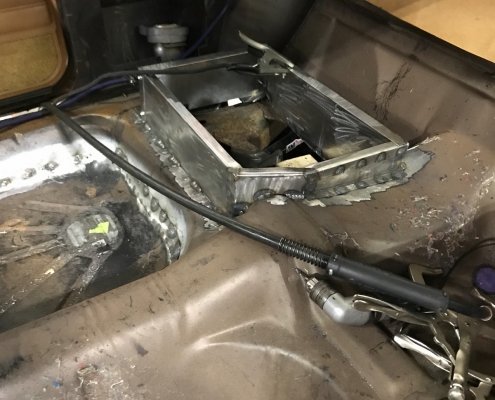
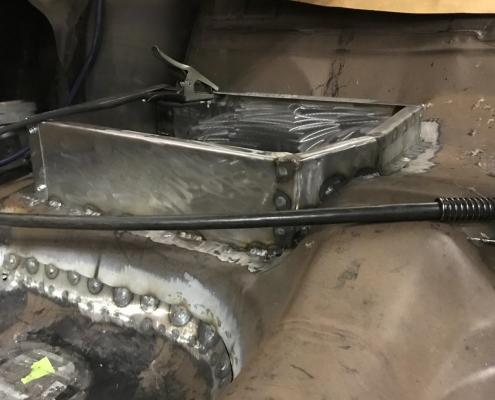
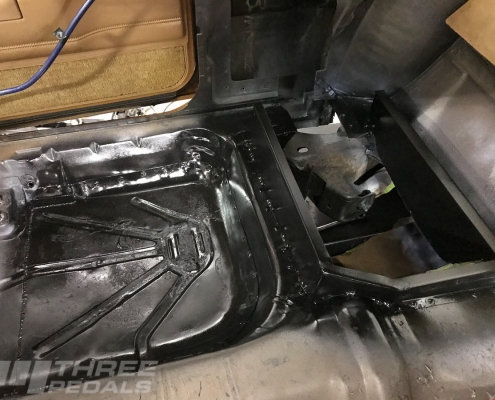
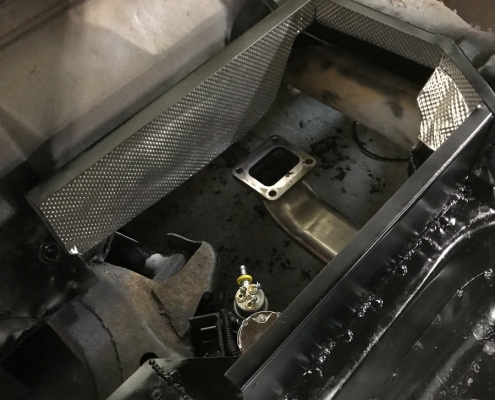
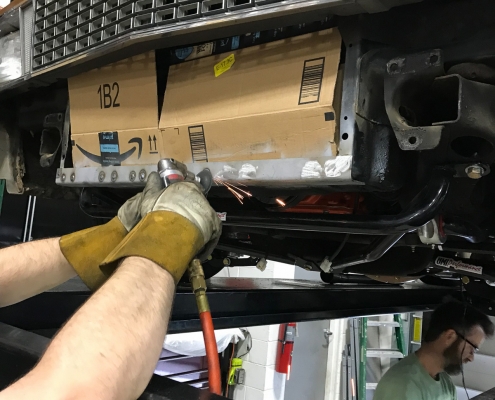
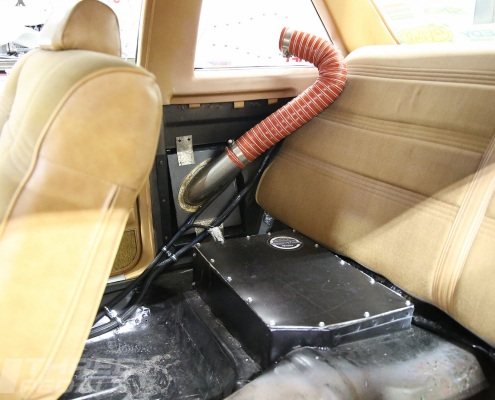
In front of the rear axle there was a little pocket of space under the back seat and we decided to stick the turbo there. We made that little pocket bigger by cutting out the floorpan section under the rear seat. And to make room for the pipes in and outta that turbo, we cut out the passenger rear seat footwell and welded it back in 2″ higher. Bet you’d never know if we didn’t tell you! Of course we couldn’t show you then either, so we’re showing and telling.
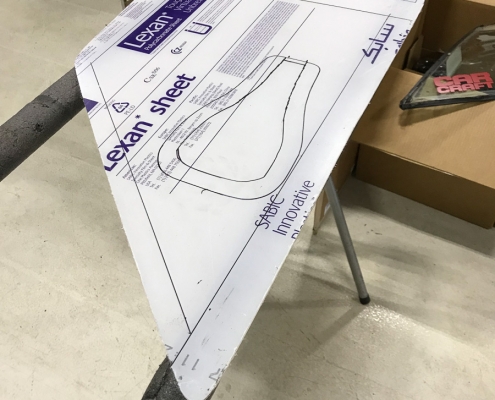
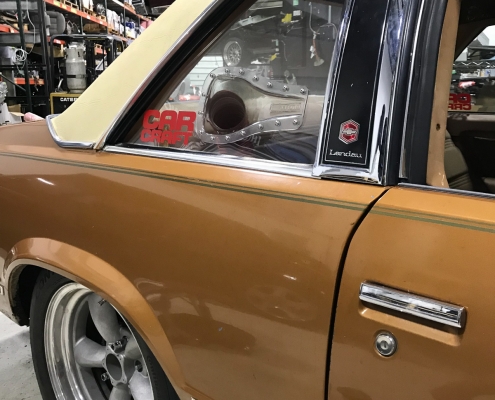
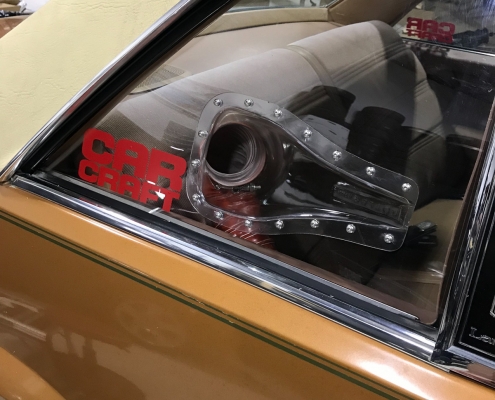
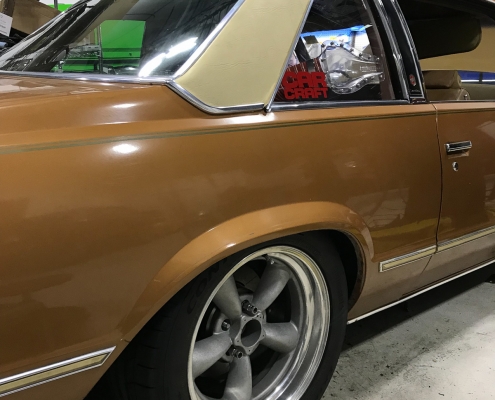
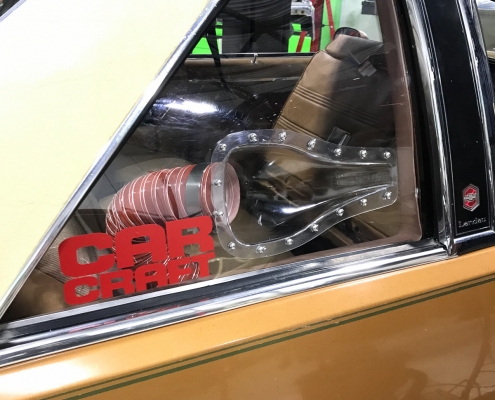
With a remote mount turbo the fresh air options are a bit different than up front under the hood. We thought it made the most sense to slap a little NACA duct into the back side window #fabricationlife. We could then duct this fresh air into the impeller side of the turbo. We got Harwood’s Lexan window for the G-Body, but we had to trim it down to fit the Landau roof – turns out the Landau actually has wider metal for the B-pillar.
To get the air to the turbo, we hacked up an Audi A6 air box we had in the parts pile and re-glued it into a shape that fit the Malibu, while retaining the stock Audi air filter size – hey gotta make service easy, right? We then cut out a little here and a little there from the body and now we have a nice straight shot from the air box into the turbo. Yes we now have to buy air filters for German cars but come on man, look how well it fits!
The airbox sits where the front passenger seatbelt is mounted, so we’ll have to relocate that. But hey, turbo and NACA duct.
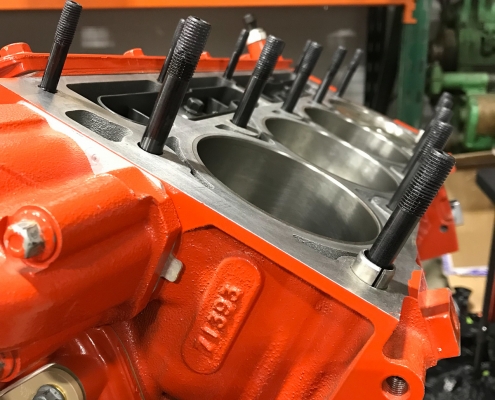
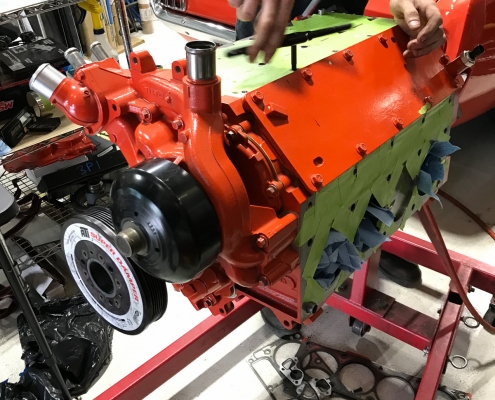
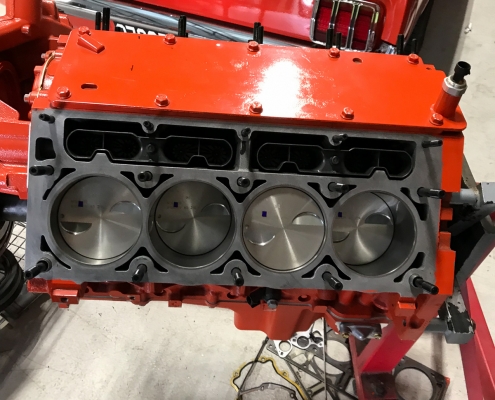
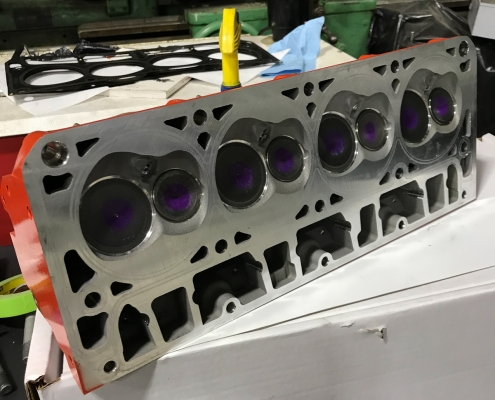
Before we get to all the pipes, we did a few things to the LS3 to help it live with some boost. Down the road we’d love to swap in some forged pistons, but in the meantime we settled on ARP head studs for extra clamping power on the heads and LS9 head gaskets which are a little thicker and will therefore lower the compression ratio a little bit. With their multilayer steel (MLS) design, the LS9 gaskets are hard to beat or beat up.
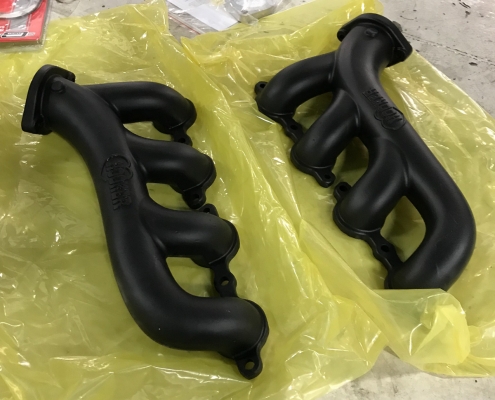
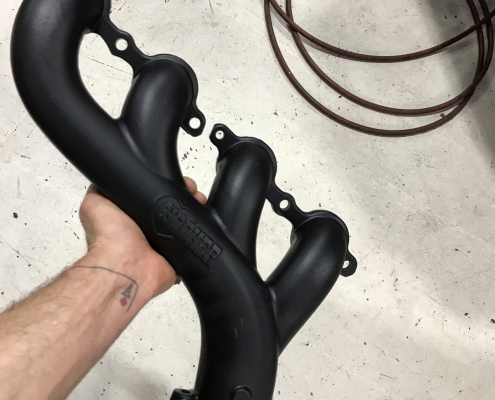
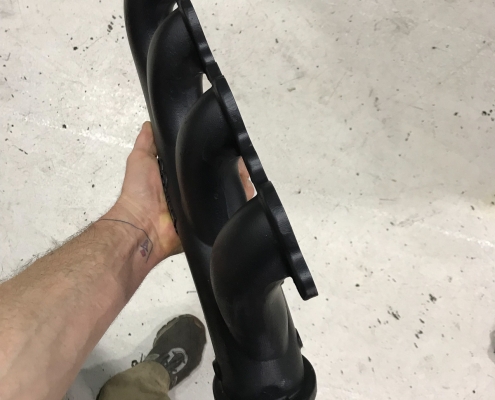
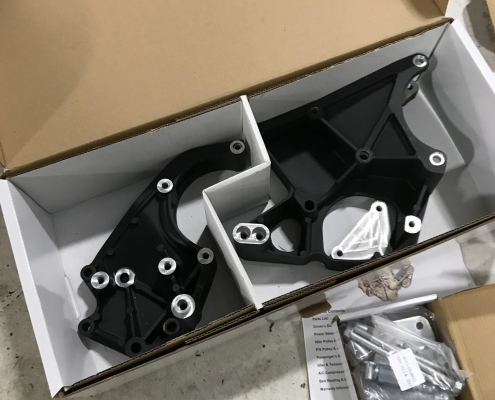
Getting the LS3 situated in the Malibu was a piece of cake. We wanted to keep the engine nice and low, not move it up or forward, so we used a bunch of Holley’s parts for the LS swap. The key parts we used include: motor mount adapters, oil pan, accessory brackets, exhaust manifolds, transmission crossmember, radiator, and radiator shroud with twin electric fans.
The oil pan is needed in order to clear the frame engine crossmember – the stock LS3 pan is too deep in the front portion and Holley’s cast aluminum pan gives a lower profile to the front portion of the oil pan, but retains a deeper sump in the back of the pan – but not too deep, it hangs level with the crossmember. With plans to race this Malibu, we also opted for Holley’s oil pan baffle kit, which helps to ensure the oil pickup is not starved for oil as racing G-forces slosh the oil to one side or another out on the track. Holley’s pan includes a new oil pump pickup as that has to be shaped to match the new pan shape. Along with the oil pan, we used a GM windage tray, GM oil dipstick and dipstick tube.
For the accessories, AC is definitely a requirement so in addition to the alternator and power steering pump we needed to mount an AC compressor as well. We used Holley’s “high mount” setup which clears everything in the G-Body. These brackets are cast aluminum – like OEM GM accessory brackets – and they’re stout and easy to install. Instead of painting our new brackets black, we opted for Holley’s black finish. They also offer natural cast aluminum and polished finishes, but we’ll take black every time. Three different fit kits finish off the accessories; since we had a truck balancer we needed the long kit. Also in black of course.
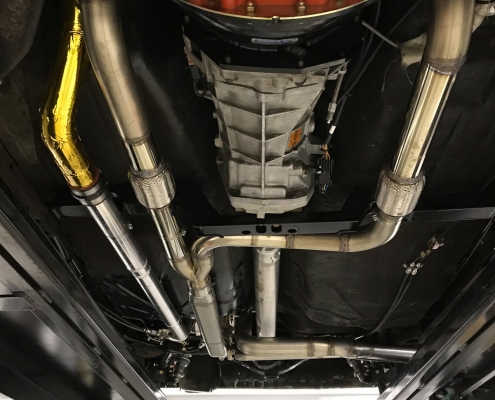
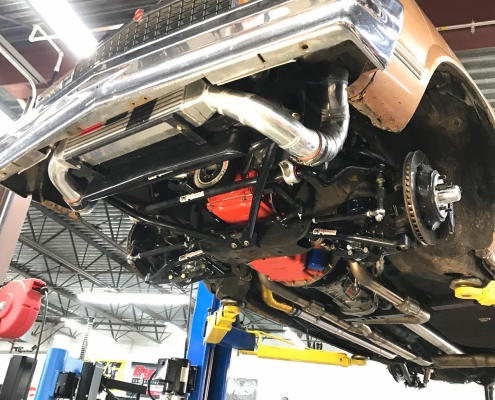
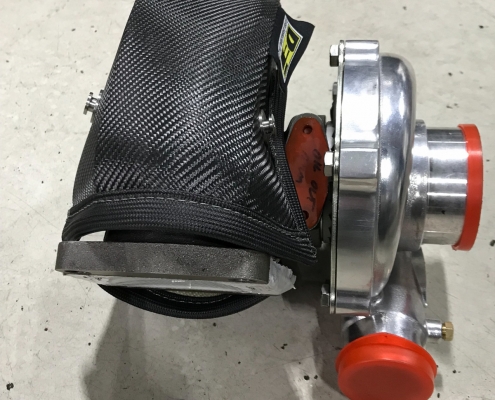
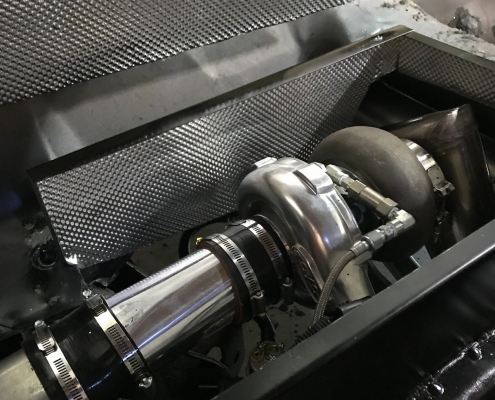
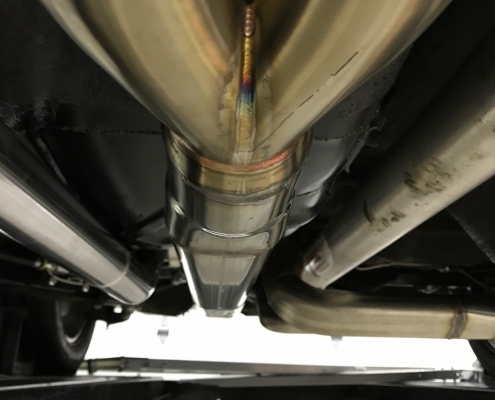
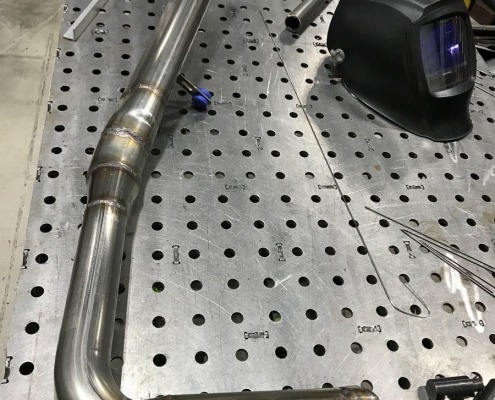
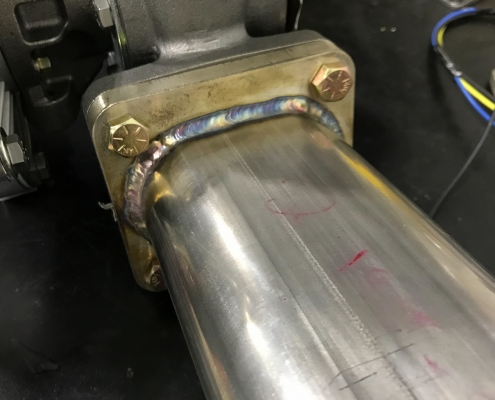
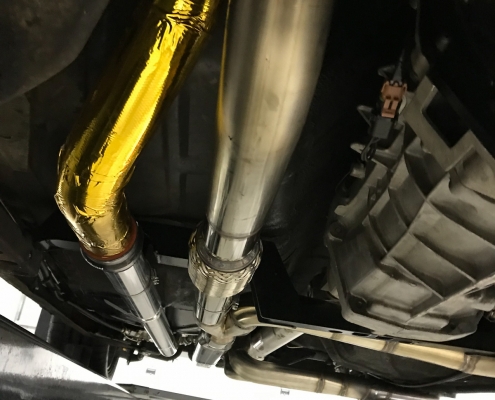
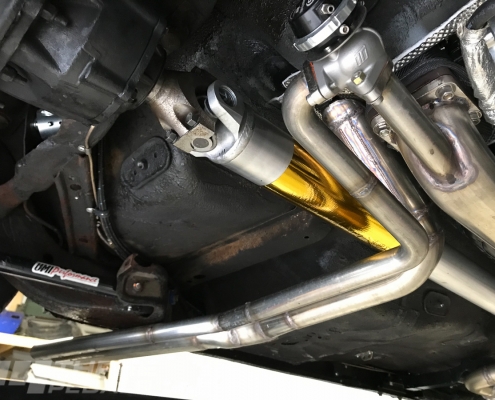
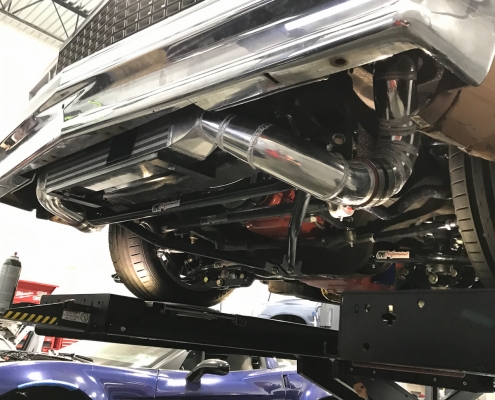
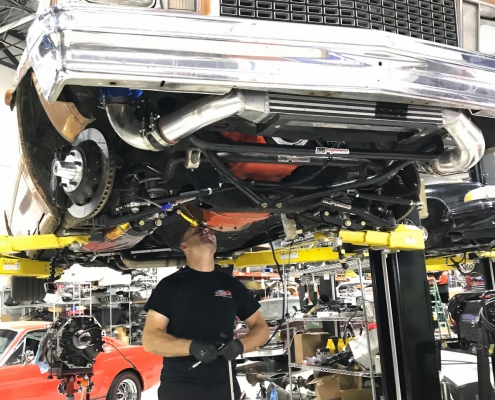
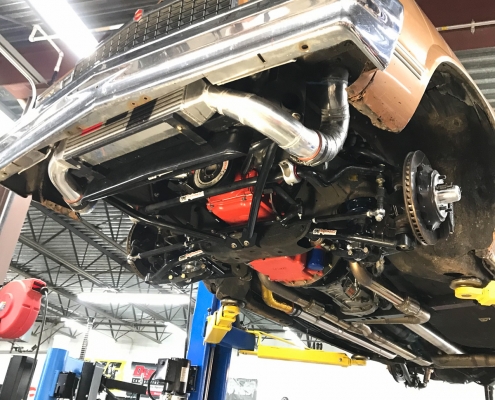
Now, time to run some pipes. Turbos like exhaust gas velocity, so we kept the pipes on the smaller side, using 2-1/2″ out of each exhaust manifold, feeding into a Y-pipe with a 3″ outlet, then transitioning to 3″ oval pipe for increased ground clearance. And the hot side inlet of the turbo is perfectly shaped for the 3″ oval pipe, so there’s that. We mounted the turbo to brackets we fabricated and attached to the body, and since the engine is attached to the frame and will move a little bit, we used Vibrant flex couplers on each pipe coming off of the exhaust manifolds. This gives us a little bit of wiggle room, cause things wiggle.
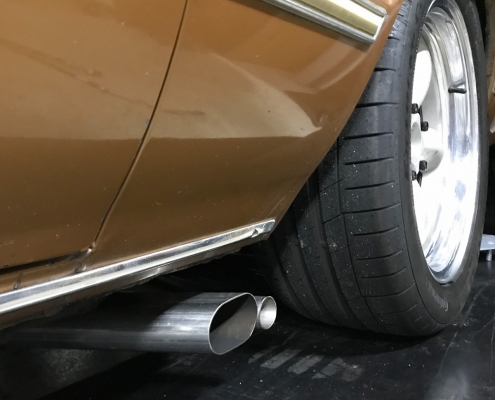
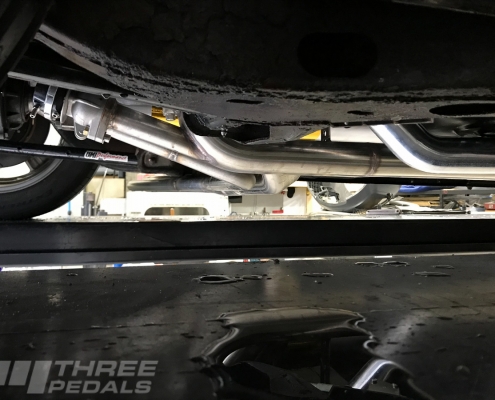
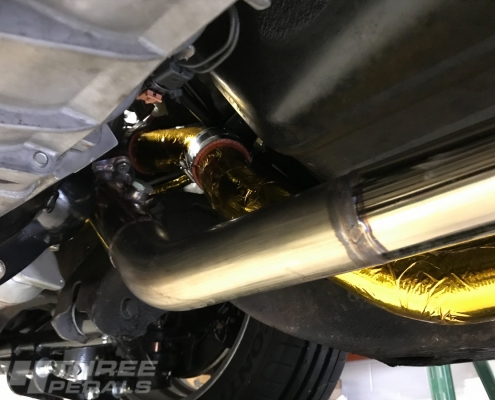
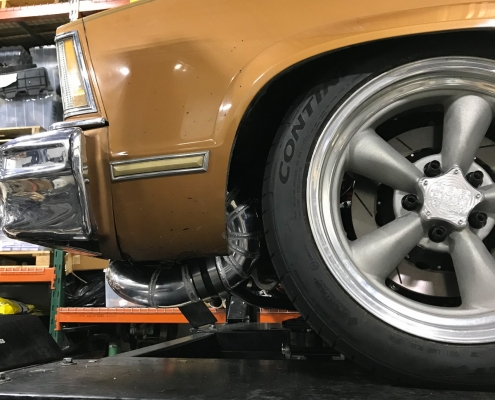
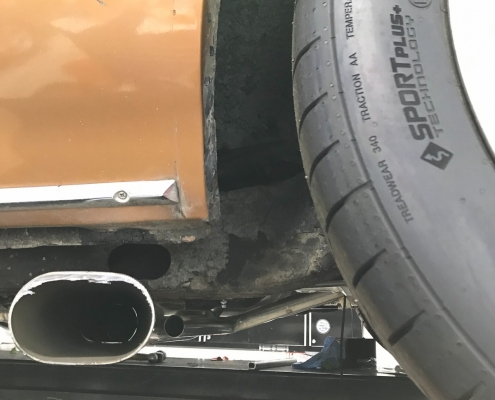
Coming out of the turbo, we’re right up against the driveshaft, so we fabricated a low profile pipe pointing downwards, feeding into 3″ oval pipe crossing the center of the car under the driveshaft, and exiting in front of the driver side rear tire. Now what about that mirror image rumor? We’ll figure out that last bit when it’s time …
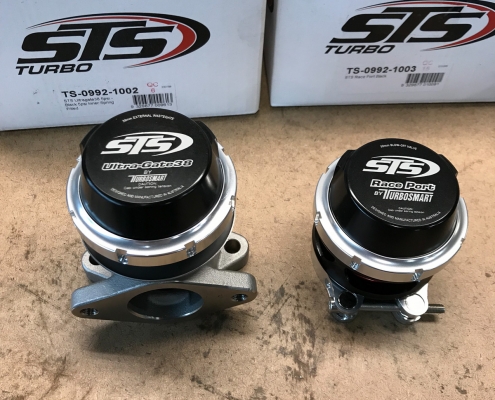
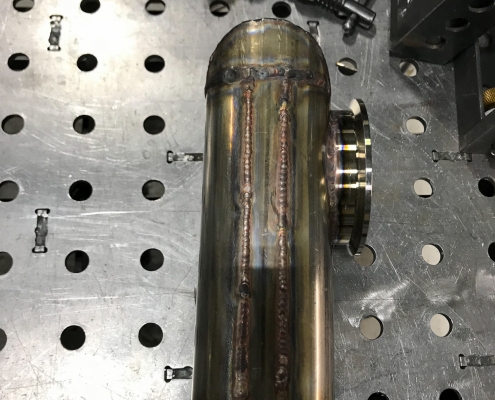
Turbos employ a wastegate in order to regulate the maximum boost – once you reach max boost, the wastegate opens up, allowing the “extra” exhaust gas to bypass the turbo. We welded in our wastegate mounting flange behind the turbo, keeping the wastegate feed pipe a straight shot off the exhaust – by the time we’re making max boost, we’re flowing pretty good so we wanted minimal restrictions. Coming out of the wastegate, we followed the curve of the 3″ oval pipe coming out of the turbo, also exiting in front of the driver side rear tire.
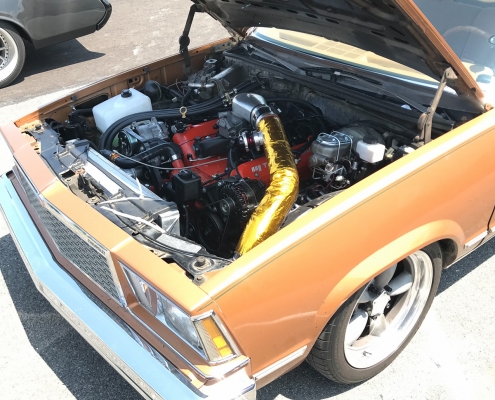
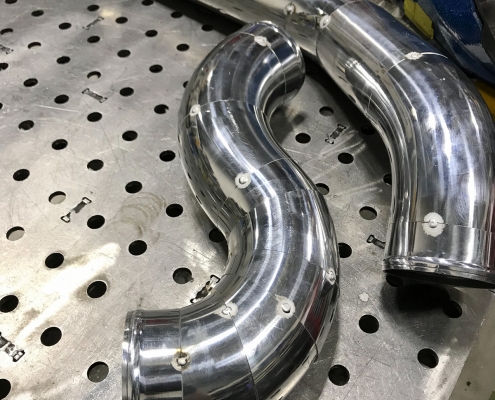
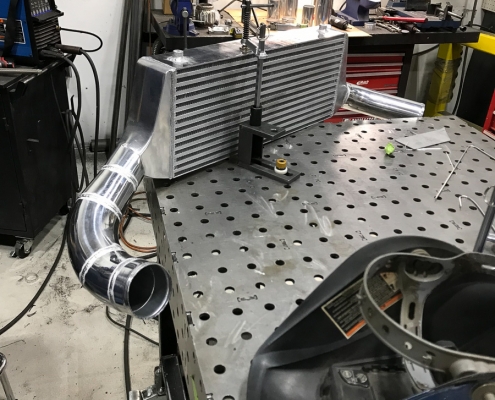
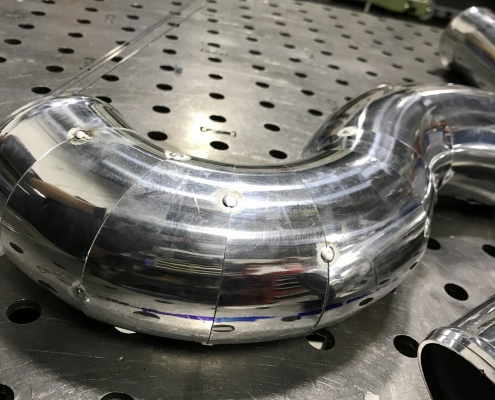
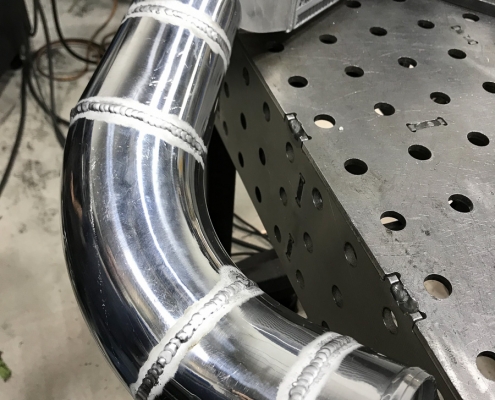
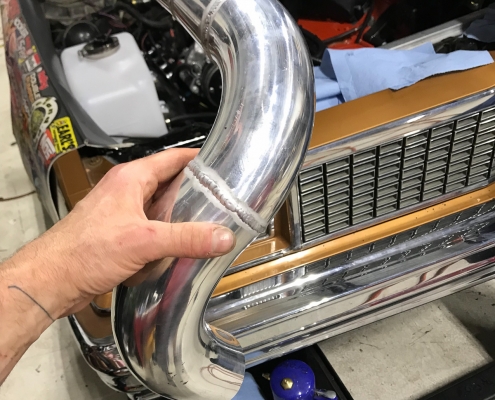
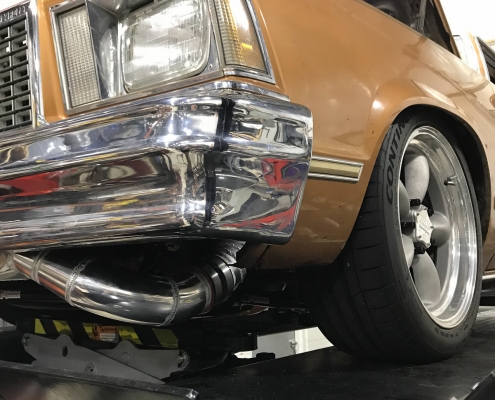
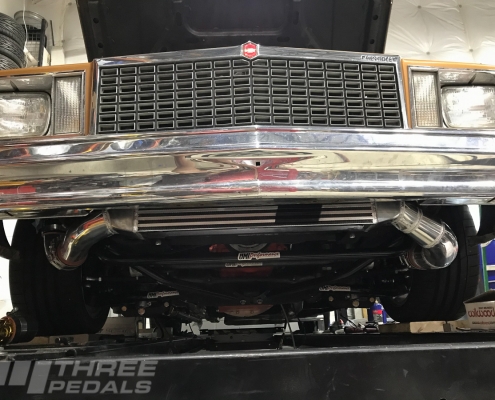
To get the air from the turbo to the engine we transformed a pile of aluminum pipe into a handful of sections that twist, turn, and expand just right. The turbo has a 2″ outlet, and we used a silicone coupler to step that up to 2-1/4″ right out of the turbo. We stepped up to 2-1/2″ pipe within 3 feet of the turbo, and notched the transmission crossmember to make room for the pipe. For the last 1 foot or so before entering the intercooler, we stepped up to 3″ pipe. Coming out of the intercooler we’re running 3.5″ pipe into the carb hat, a low profile piece by Procharger that is designed to straighten out the airflow as much as possible before entering the throttle body.
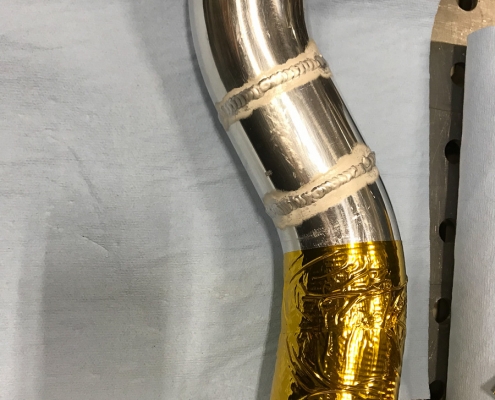
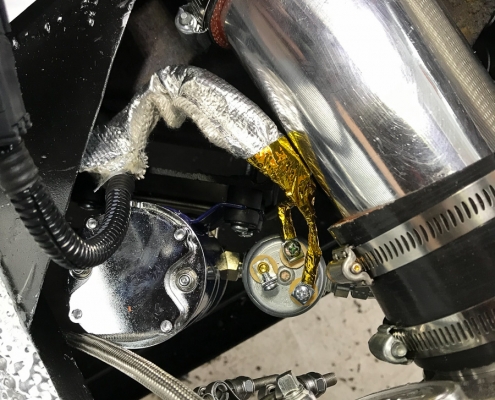
We want the air coming into the engine to be as cool as possible so an intercooler was in order. Additionally, where the intake tubing ran close to the exhaust, we used Design Engineering’s Reflect-a-Gold heat insulation.
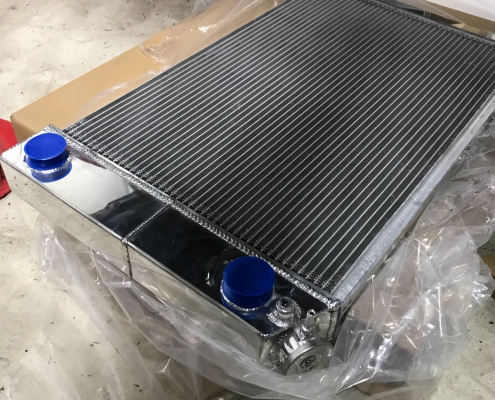
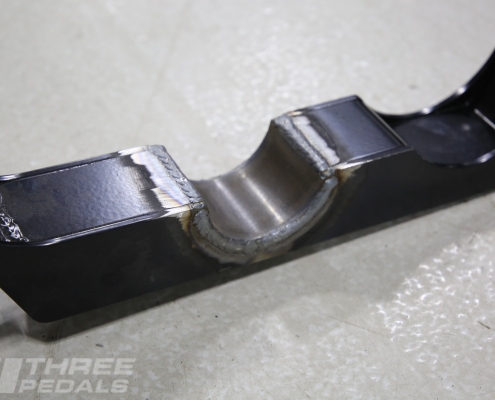
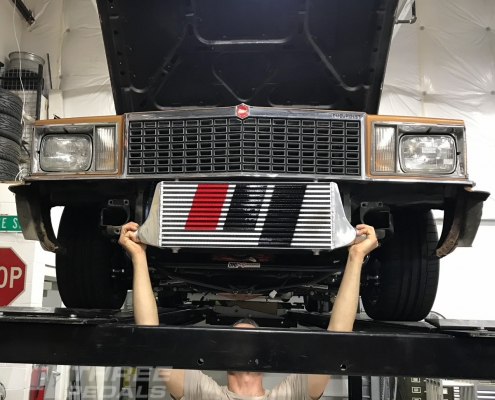
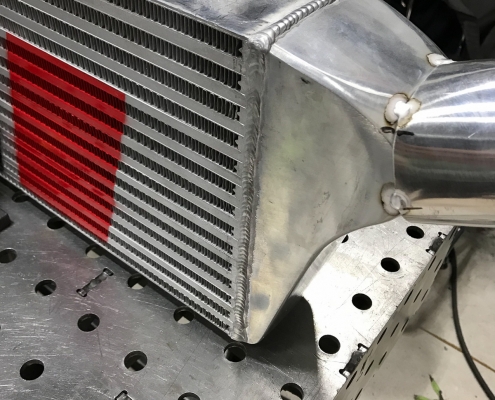
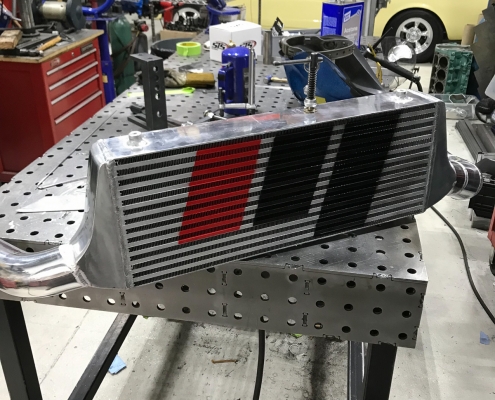
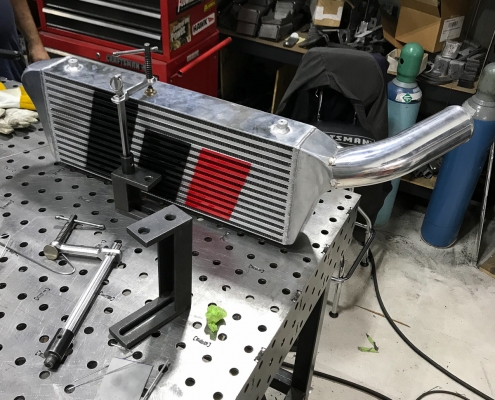
We considered air-to-air as well as liquid-to-air intercoolers, and ultimately chose the biggest air-to-air intercooler we could fit between the front bumper and AC heat exchanger. Our intercooler is from CX Racing with a core that is 23″ wide, 9-1/2″ tall, and 3-1/2″ thick.. To fit the intercooler we had to trim the back side of the front bumper, trim the mounting plates, and remove the central plate. To mount the intercooler we first reinforced the bottom central span of the core support and then fabricated a steel cage hanging off the new reinforcement. We might get away with attaching a snow plow to this reinforcement, but we’re running 3 season tires.
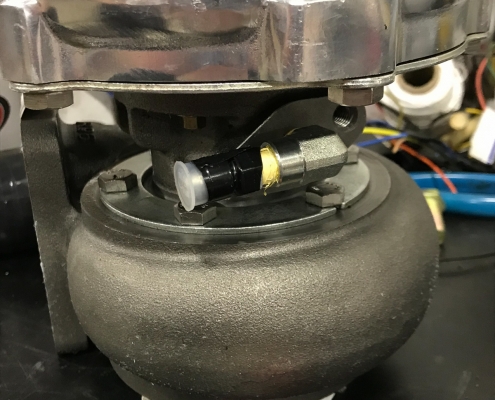
Turbos are usually cooled by engine oil, and with a remote mounted turbo getting the oil to and from takes a little effort, but it’s pretty straightforward. Our turbo kit came with most of the parts we needed, but we had to find the right place to mount everything and we had to connect up to our engine. In addition to the distance, the remote mounted turbo is likely lower than the engine, which creates other implications.
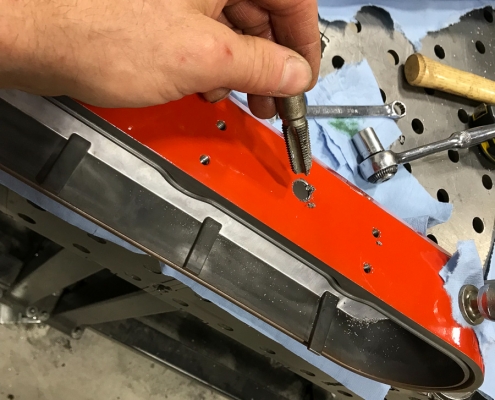
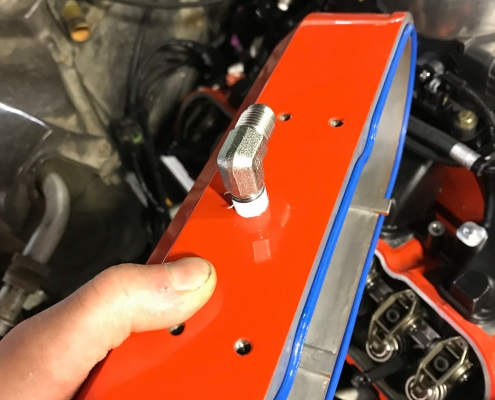
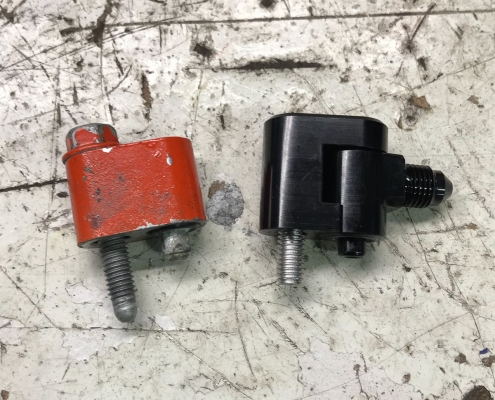
For the supply side, we tapped into the port on the LS at the front on driver’s side, and used this M16 x 1.5 to 1/8″ NPT adapter. From there, we used the included 1/8″ NPT 90 degree adapter to -4AN and hooked up the included pre-made high pressure stainless steel braided -4AN hose, xx feet long.
The supply line goes into the top of the turbo housing, and the return line exits from the bottom – the compressor and exhaust sides are each clockable so you can position the turbo in a number of orientations. The included check valve must be installed between the supply line and the turbo, otherwise engine oil will continue to gravity feed into the turbo when you shut the engine off; the check valve blocks the flow until pressure gets above a certain level.
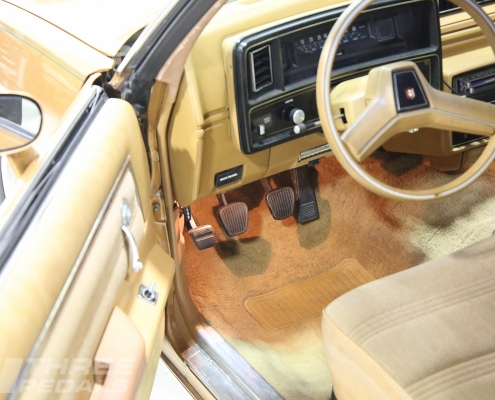
The included return line is 3/8″ ID rubber hose with -6AN push-lock fittings. Oil is scavenged from the turbo and pushed back to the engine by the included electric pump, which is switched on when the car is running. Inline with the pump is a sensor watching for pressure falling below 3 psi; if it does, the included buzzer will sound off. You definitely want that oil coming back, otherwise things are going to get messy! So don’t skip the buzzer mounting step, k? We installed our buzzer behind the lower dash trim.
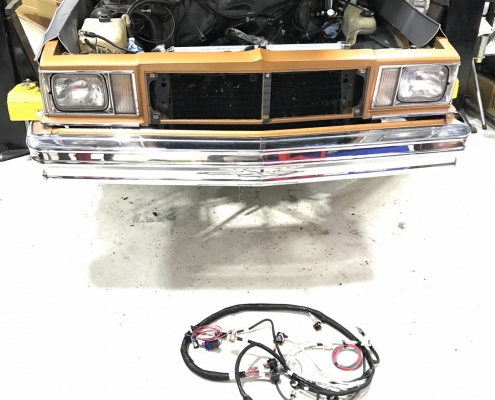
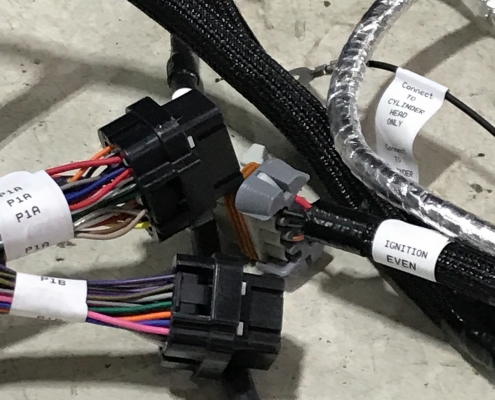
To finish off the Holley EFI we needed to swap to their LS harness so we could employ all the requisite sensors and devices. Holley’s harness is nicely made, with braided sleeving protecting the wiring and giving a clean look, and each connector is clearly labeled. Our Terminator ECU was already mounted to the passenger side floor footwell, with a long lead USB plug routing out through the ashtray for plugging into the laptop for tuning. In contrast to the small block setup we were running, the LS also has two knock sensors, an individual coil for each cylinder, a crank position sensor, oil pressure sensor, and more. We also wired and plumbed in a fuel pressure sensor so we could keep an eye on it, because going lean on a turbo motor can make a bad bang.
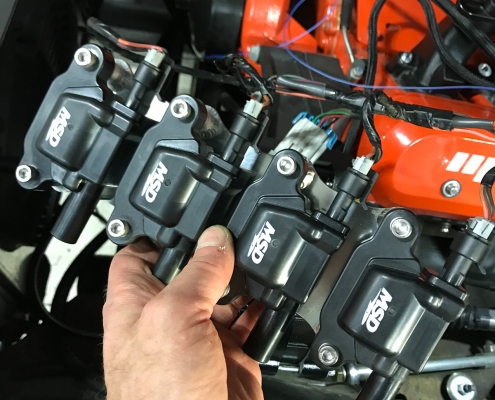
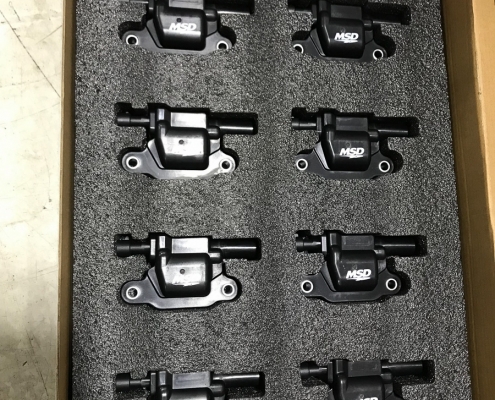
The LS puts the coils on top of the valve covers – but we love our logo valve covers, so that wouldn’t work. To get the coils off the covers, we used Holley’s TIG welded aluminum remote coil mount brackets, one on each side, mounted to the inner fenders. To make install and removal as simple as possible we drilled a few new holes in each bracket and used clip on barrel nuts, and installed the bolts from the outside of the each inner fender.
MSD coils and spark plug wires keep the juice flowing, and we opted for the wires with protective booties to make sure they don’t melt.
We’re running NGK TR6 spark plugs gapped at 0.035″. As we increase boost we’ll need to make that gap a little smaller, but for our current levels this is perfect.
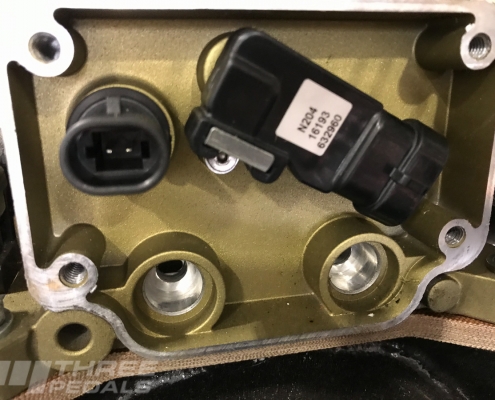
The throttle body was setup for a naturally aspirated motor, and to get it ready for the turbo we just needed to change the manifold absolute pressure (MAP) sensor. The stock sensor reads vacuum only, it does not read positive pressure, so we swapped in a 2 bar MAP sensor. The front cover on the throttle body hides the MAP sensor and the manifold air temperature (MAT) sensor, as well as two fuel injectors. Swapping the MAP sensor in the throttle body is a piece of cake, but also requires a corresponding change in our tune file.
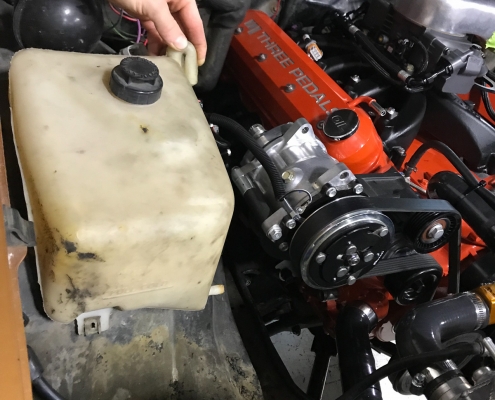
Finishing up under the hood, our coolant overflow tank was pretty beat looking so we picked up a new overflow tank from Dixie Restoration Depot. We also got their washer fluid tank and wow what a difference those little details make. Dixie’s parts are nearly identical to the original parts and the plastic is thick where it needs to be, ensuring years of long life.
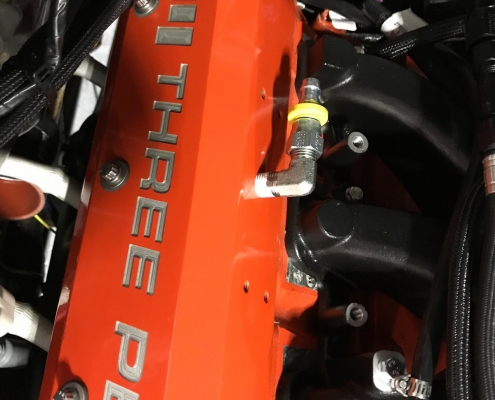
We swapped the factory steam vents for Earl’s swivel vents, which allows for cleaner routing of the steam lines. The venting process is critical as the LS thermostat is below the high point of the engine, so you can’t vent air pockets that way. The LS3 uses one vent at the front of each head, but the back of each head is also drilled for a vent. We used Earl’s 4 vent kit to keep the cooling system purged of air. Plus it’s trick looking, using stainless steel braided hose to connect everything. We ran the final vent hose into the top radiator hose by using an inline coupler with a 1/8″ NPT port.
OK we have so much more to cover, in the next post we’ll twist the key.
Lots more pictures in the gallery below, enjoy!
 https://threepedals.com/wp-content/uploads/2019/08/Three_Pedals_CC_Malibu_LSFE19_burnout_cov.jpg
207
300
Josh Korsower
https://threepedals.com/wp-content/uploads/2017/09/three-pedals-logo-2017.svg
Josh Korsower2019-09-23 07:40:372019-09-25 19:36:18LS Fest X Burnout Contest
 https://threepedals.com/wp-content/uploads/2019/08/CCM-LS-Turbo-cov.jpg
207
300
Josh Korsower
https://threepedals.com/wp-content/uploads/2017/09/three-pedals-logo-2017.svg
Josh Korsower2019-09-19 13:54:372019-09-22 18:55:16STS Turbo and LS3 find a home in the CC/Malibu
CC/Malibu Hits the Track After Suspension Tuning by UMI Performance
 https://threepedals.com/wp-content/uploads/2019/05/CCSN_burnout_cov.png
205
300
Josh Korsower
https://threepedals.com/wp-content/uploads/2017/09/three-pedals-logo-2017.svg
Josh Korsower2019-05-18 08:57:232019-09-21 16:37:09CC/Malibu Smokes the Burnout Contest
 https://threepedals.com/wp-content/uploads/2019/05/CCSN-dyno-cov.png
206
300
Josh Korsower
https://threepedals.com/wp-content/uploads/2017/09/three-pedals-logo-2017.svg
Josh Korsower2019-05-18 08:41:232019-09-21 16:37:07CC/Malibu on the Dyno

Car Craft Magazine: G-Body Malibu 5-Speed Swap: New Kit Supplies Pedals … No Cutting!
Car Craft Magazine: Art Of Deception: Self-Learning EFI That Looks Like A Carb!
Interesting links
Here are some interesting links for you! Enjoy your stay :)Pages
- 2012 Dodge Charger SRT8
- Big Brake Kits
- Clutch Play
- Factory Seconds
- G-Body Electric Sensor Options
- GM B-Body / Impala SS Kit
- Launch
- My Rides
- Our Builds
- Shaken & Stirred Build Products
- Shift Knobs
- Shop
- SSubtle Take Build Products
- Wholesale Login
- Wholesale Store
- 1989 Pontiac Safari
- Add Ride
- Dakota Digital HDX Instrument System Specifications
- Master Automotive Technician
- Pedals
- 24 Karat Olds
- Dakota Digital RTX Instrument System Specifications
- GM A/G-Body Kit
- Merch
- Press
- 2015 Ford Mustang GT
- Bellhousings
- Dakota Digital VHX Instrument System Specifications
- Military Discount
- 2007 BMW 328xi
- Chrysler LX / Dodge Charger Kit
- Clutches
- Dakota Digital VFD Instrument System Specifications
- Clutch Fluid Reservoirs and Brackets
- Ford Panther / Crown Vic Kit
- Jobs
- 1995 Caprice 9C1 6 Speed
- Clutch Hydraulics Packages
- 1977 Mercedes 6.9
- Clutch Master Cylinders
- 1977 Toyota FJ40
- Clutch Pedal Electronics
- Dakota Digital Instrument Clusters
- Pedals & Drivetrain Swaps
- Three Pedals #14
- 1988 Cutlass
- Driveshafts
- Trucks
- 1995 Chevrolet Impala SS
- Flywheels
- New Products
- Hydraulic Release Bearings
- SSubtle Take
- T56 Teardown
- 1961 Impala
- Pilot Bearings and Bushings
- Reverse Lockout
- Welcome to Three Pedals!
- Shift Levers & Shift Knobs
- Car API
- Transmissions
- Events
- Transmission Crossmembers
- 1996 Impala Console
- Transmission Install Packages
- Transmission Mounts
- G-Body Request a Quote
- Tremec TKX 5 Speed Transmission
- Request a Quote
- Shaken & Stirred
- Transmission Tunnels
- Clearance Items
- Car Craft Malibu
- Car Craft Malibu Build Products
- Conversion Kits
- Products
- Shop Online
- Rides Gallery
- About Us
- Services
- Blog
- Contact
- Info
- Cart
- Shipping & Returns
- Privacy Policy
- Terms of Use
- Checkout
- My Account
- Vehicle Search
- Cart
Categories
- 1961 Impala
- 1973 Oldsmobile Cutlass
- 1977 Mercedes 6.9
- 1977 Toyota FJ40
- 1988 Cutlass
- 1989 Pontiac Safari
- 1991 Jeep Wrangler
- 1992 Land Rover D90
- 1995 Caprice 9C1 6 Speed
- 1995 Chevrolet Impala SS
- 1996 Impala Gen V LT1
- 2007 BMW 328xi
- 2012 Dodge Charger SRT8
- 2015 Chevy SS
- 2015 Mustang GT
- 2017 Jeep Rubicon Recon Unlimited
- 2017 Toyota Tacoma
- 499HP Caprice
- About Press
- Blog
- CC/Malibu
- CC/Malibu Blog
- CC/Malibu Video
- FAQ
- Press
- Projects
- Shaken Blog
- Shaken Cool Kids
- Shaken Press
- Shaken Video
- T56 Teardown
- Technical
- Three Pedals #14
- Three Pedals #16

